Feb 15, 2023
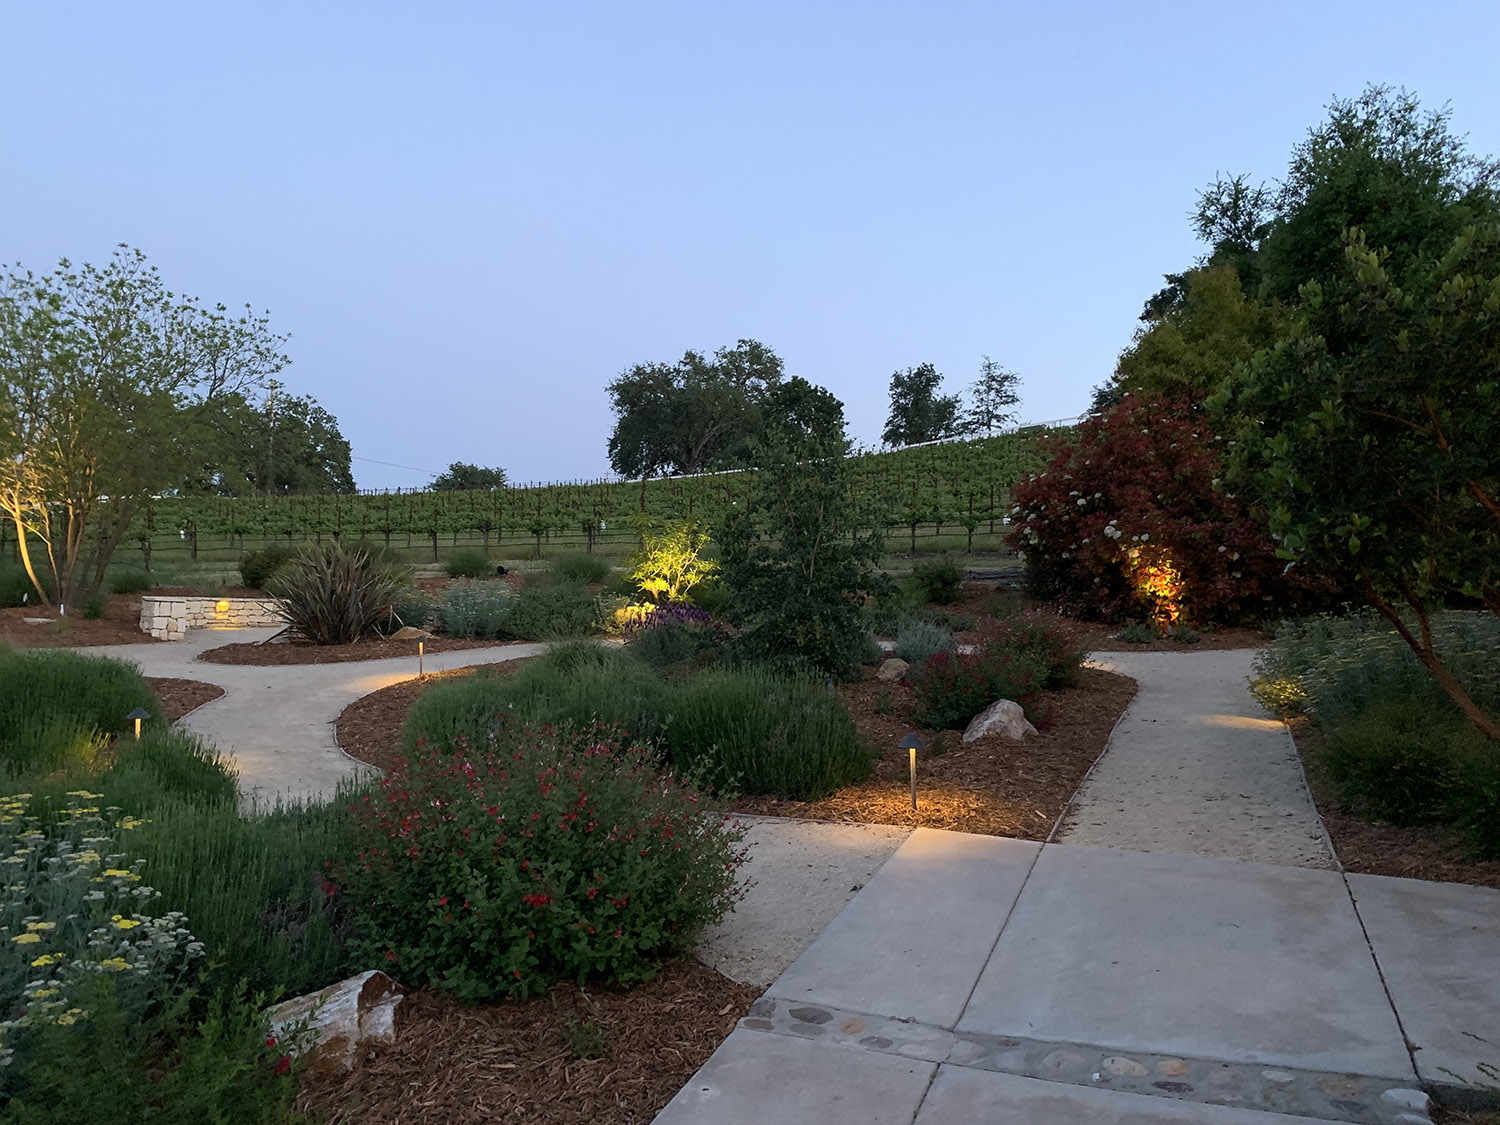
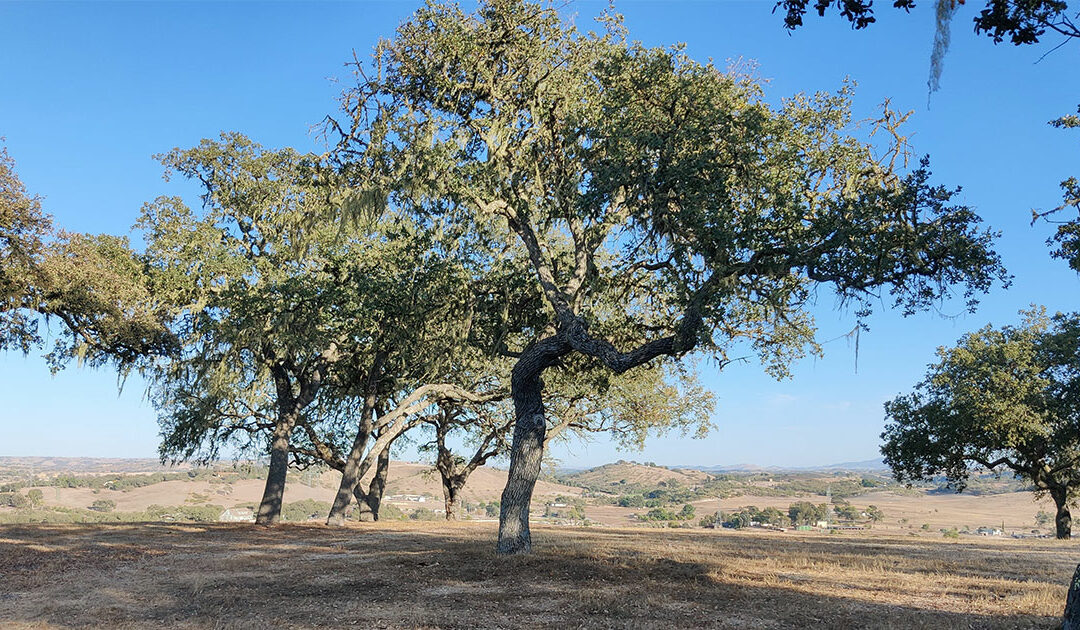
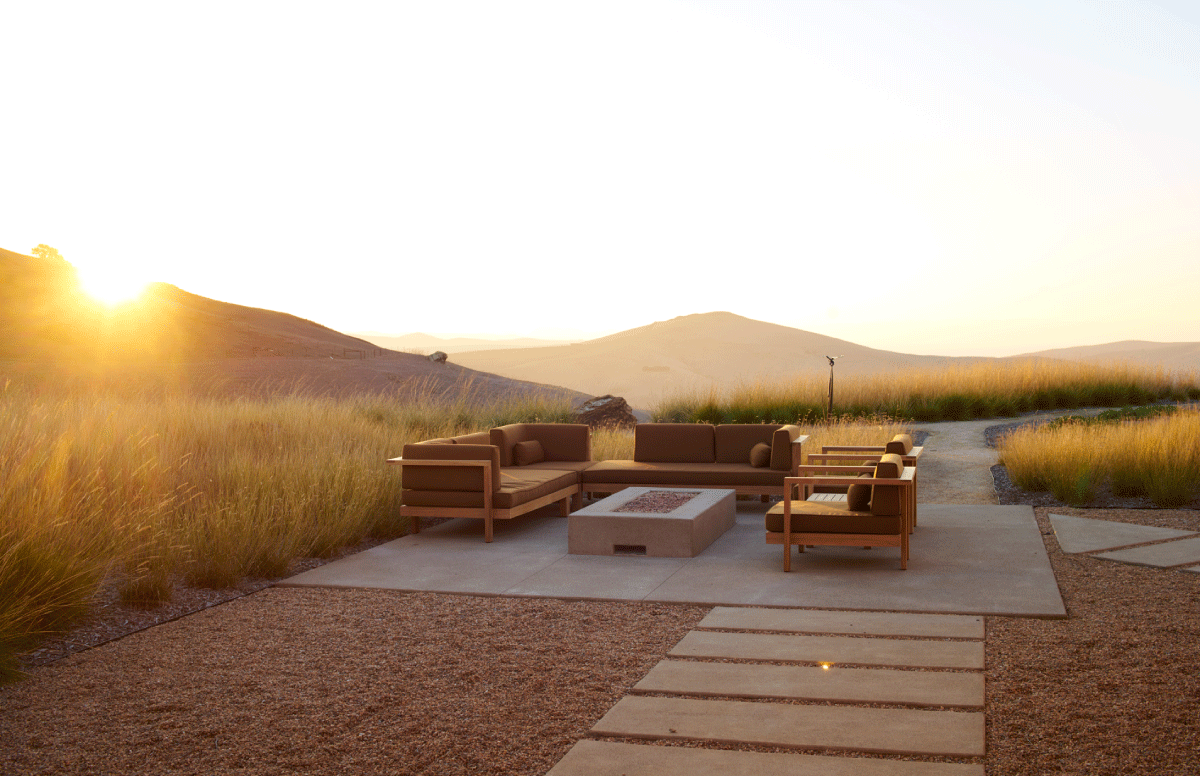
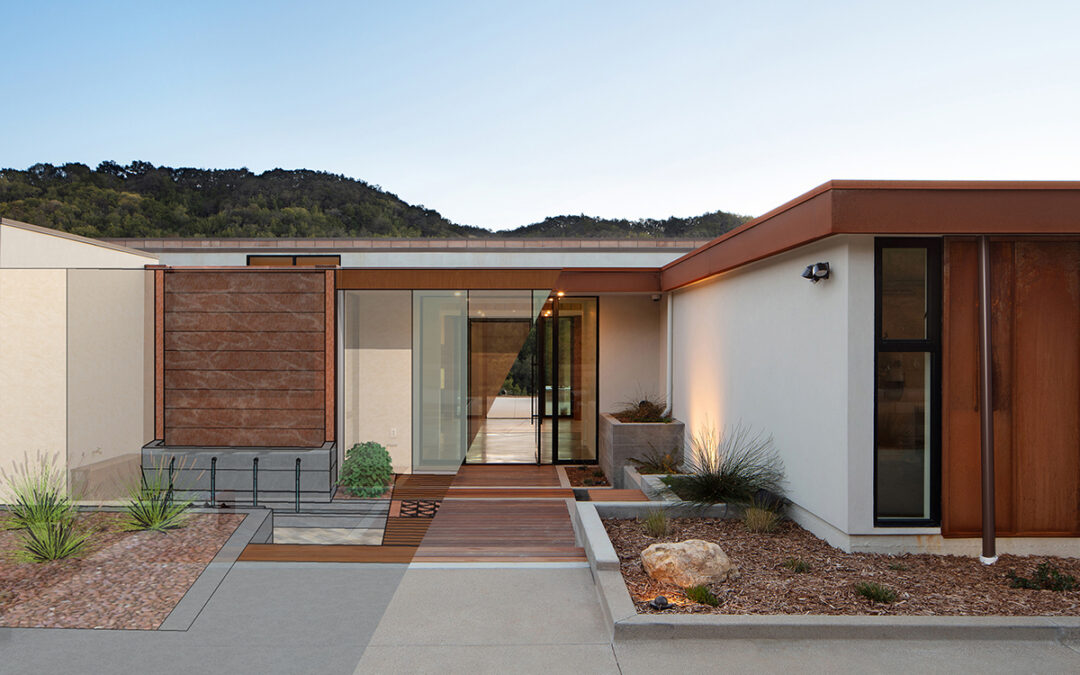
Perched on a hilltop in Templeton, this new residence boasts sweeping view back into the valley. Madrone Landscape provided design-build services to capture and encourage the beauty of both the site itself and the area.
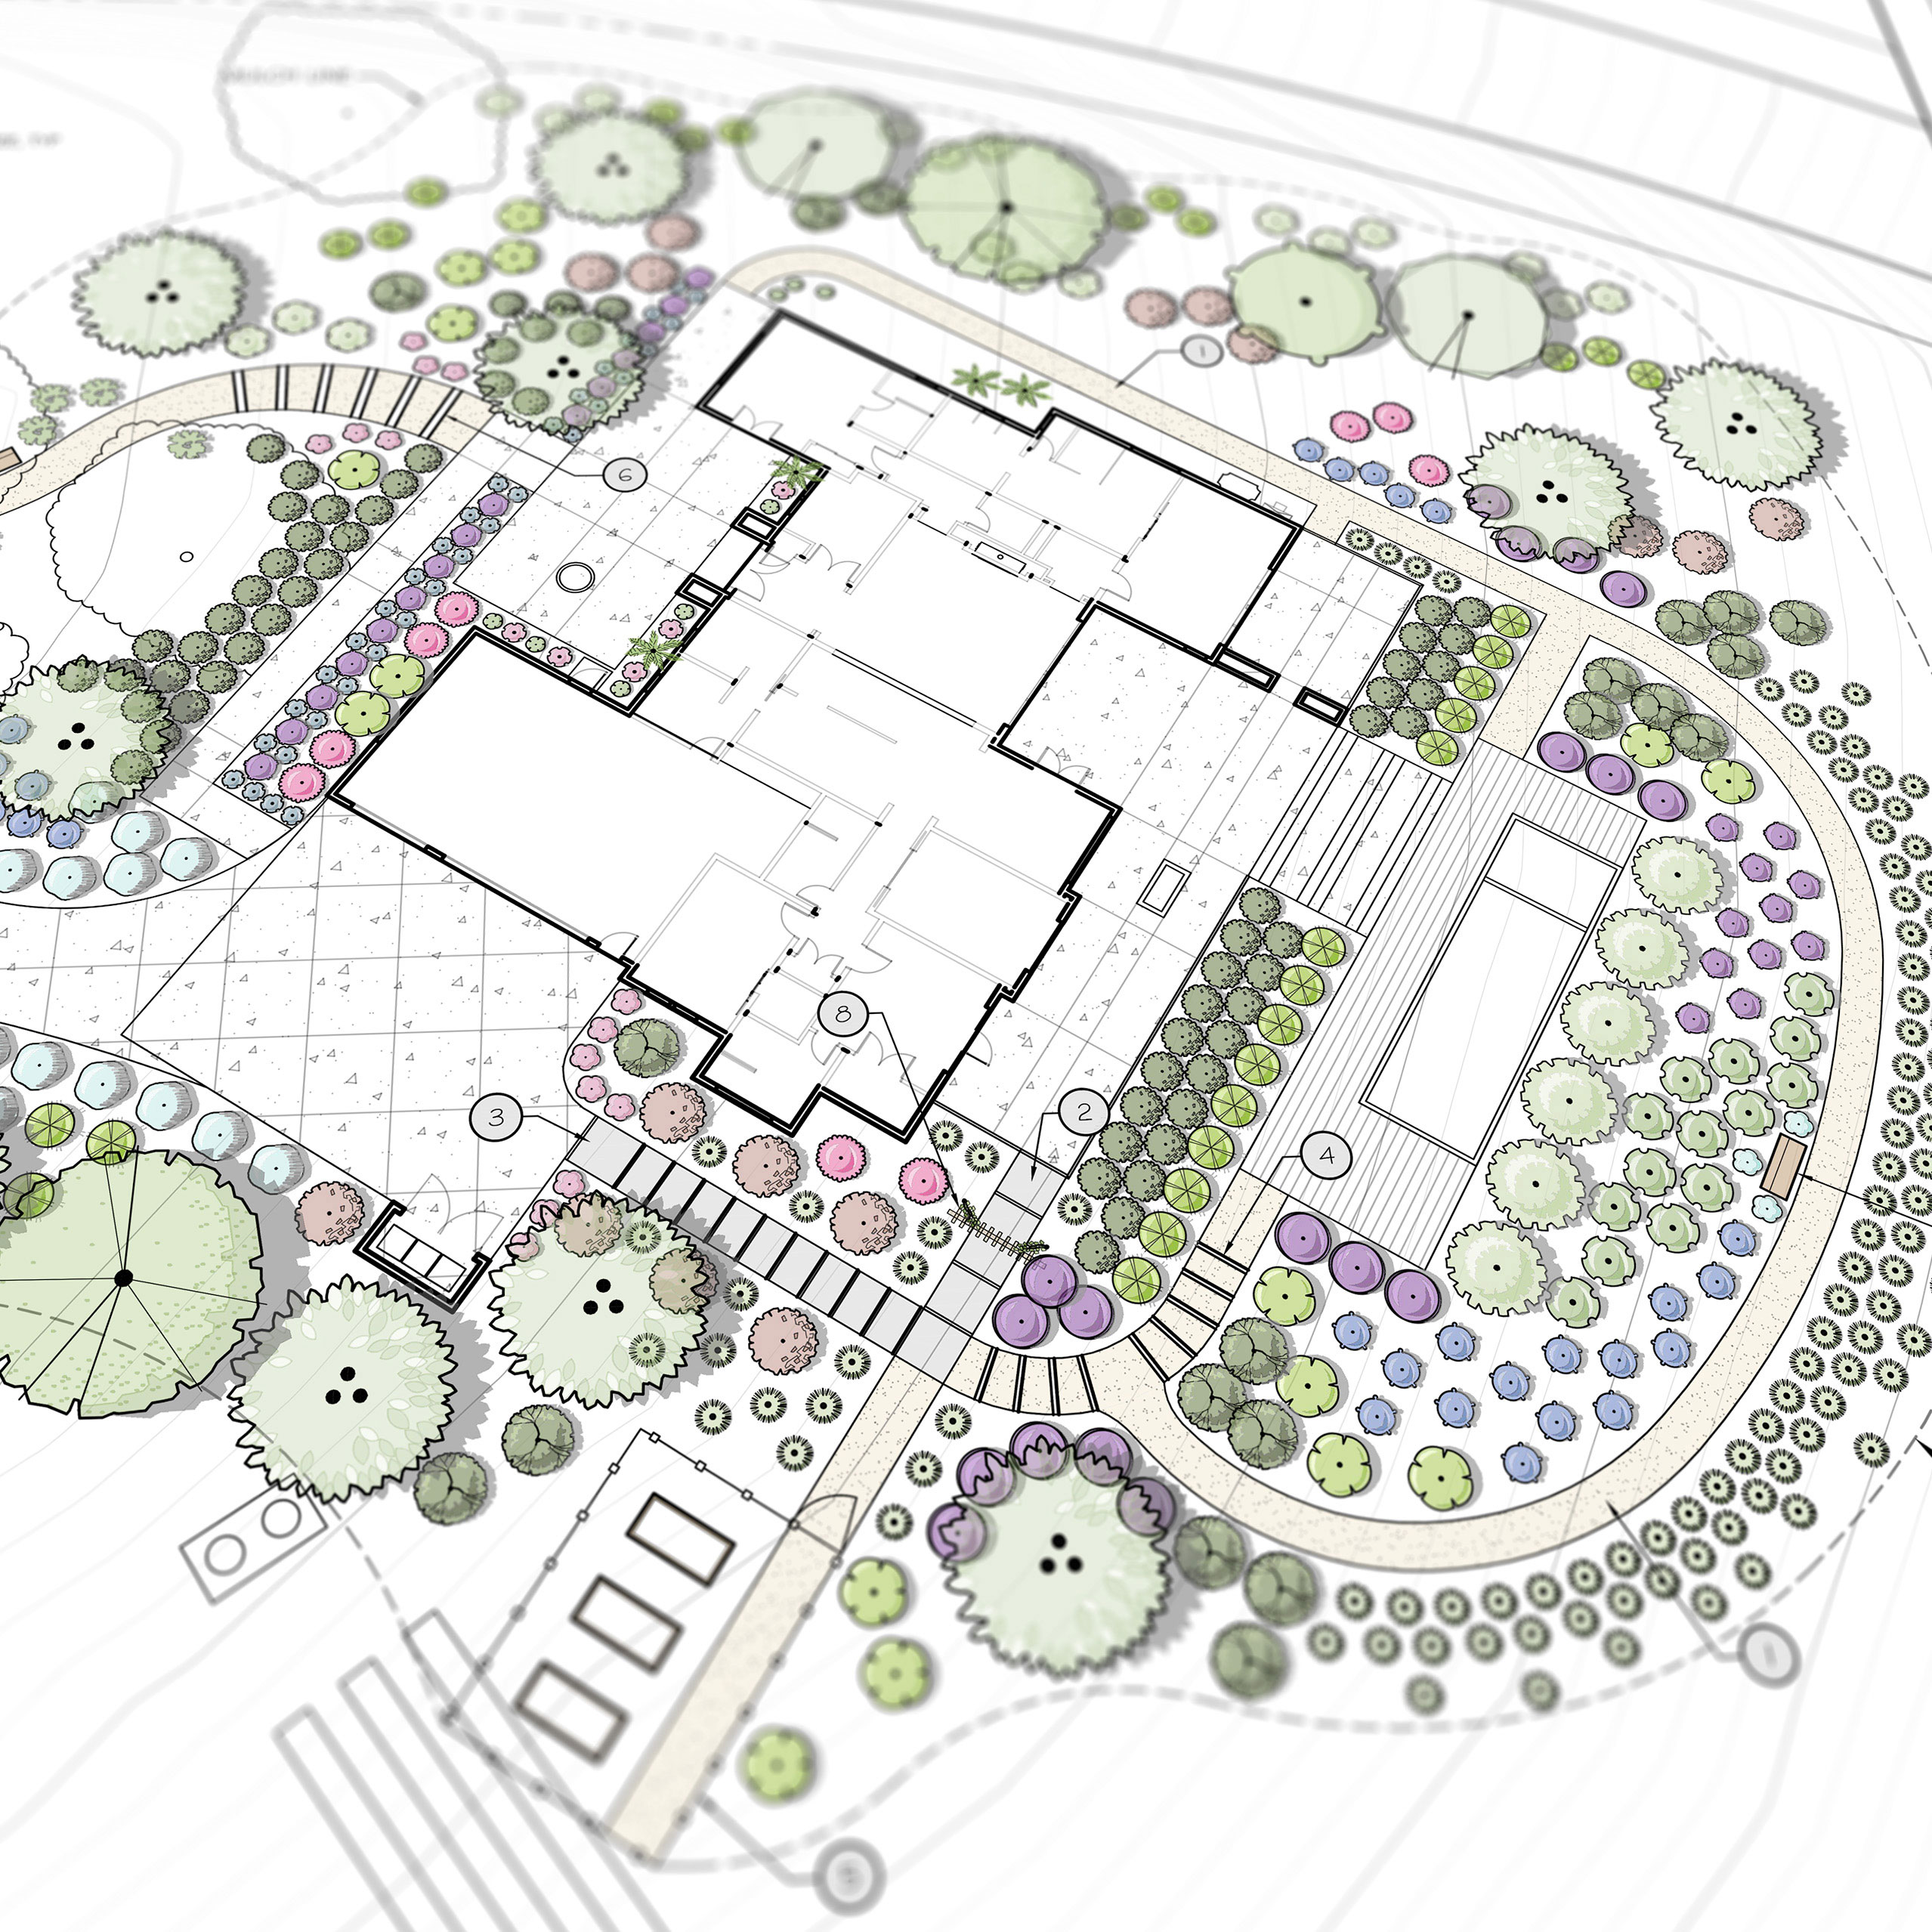
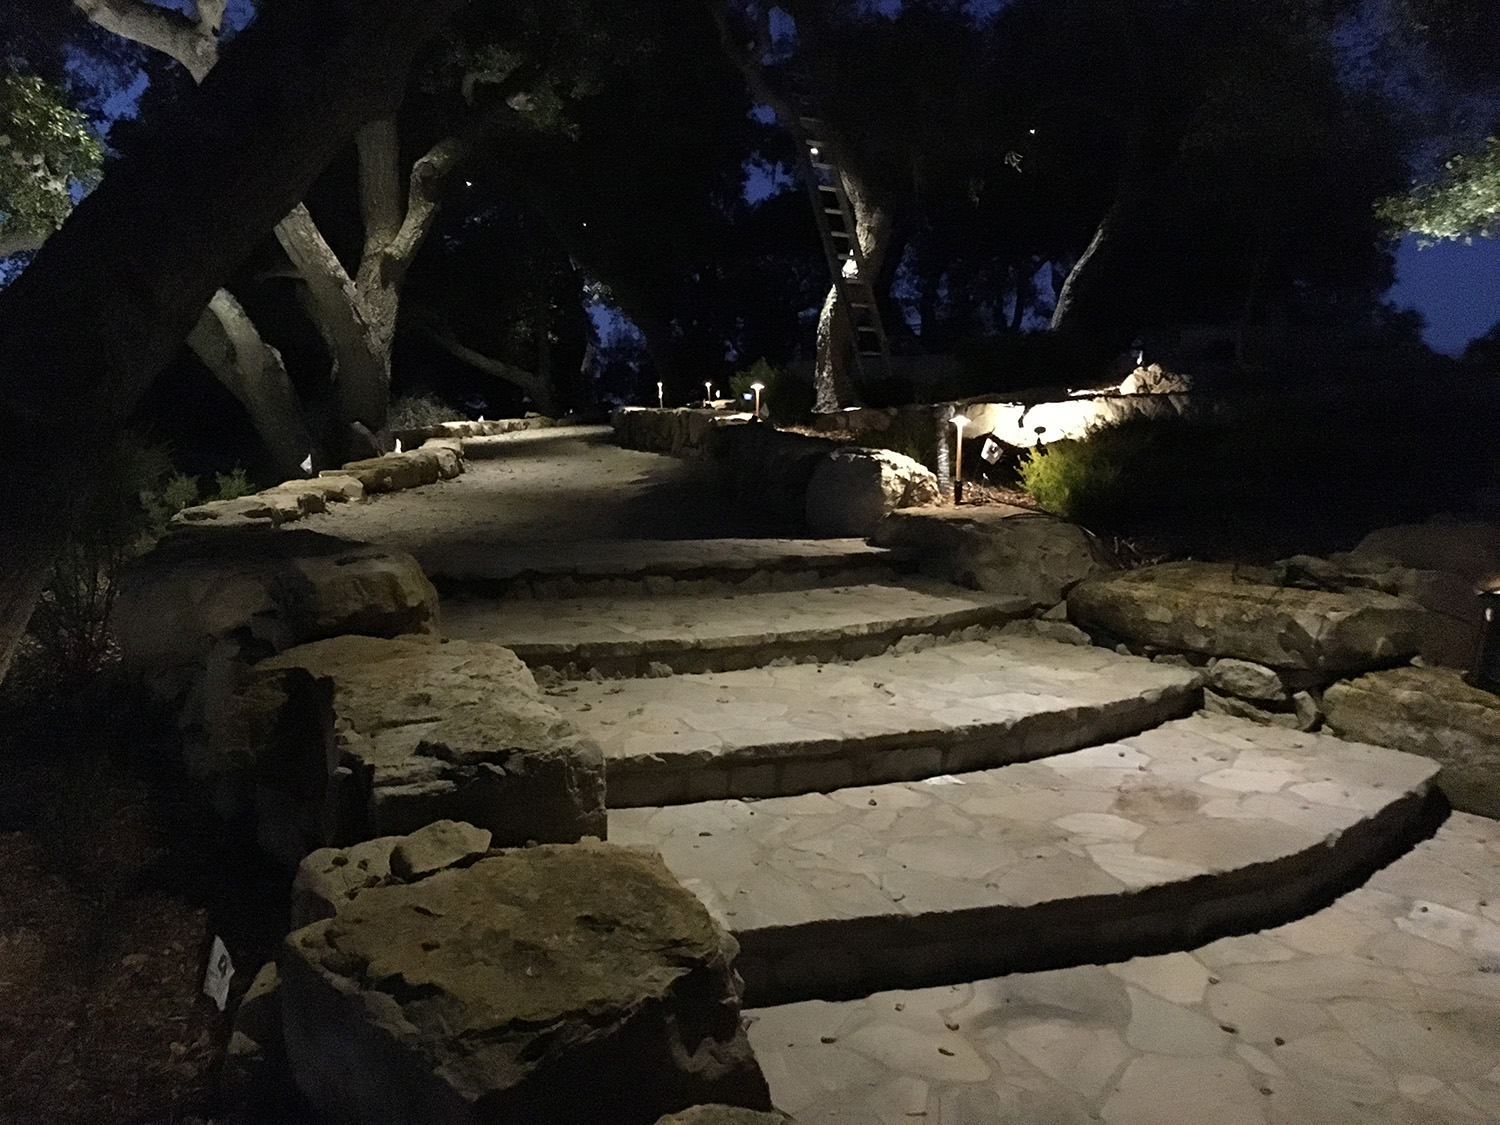
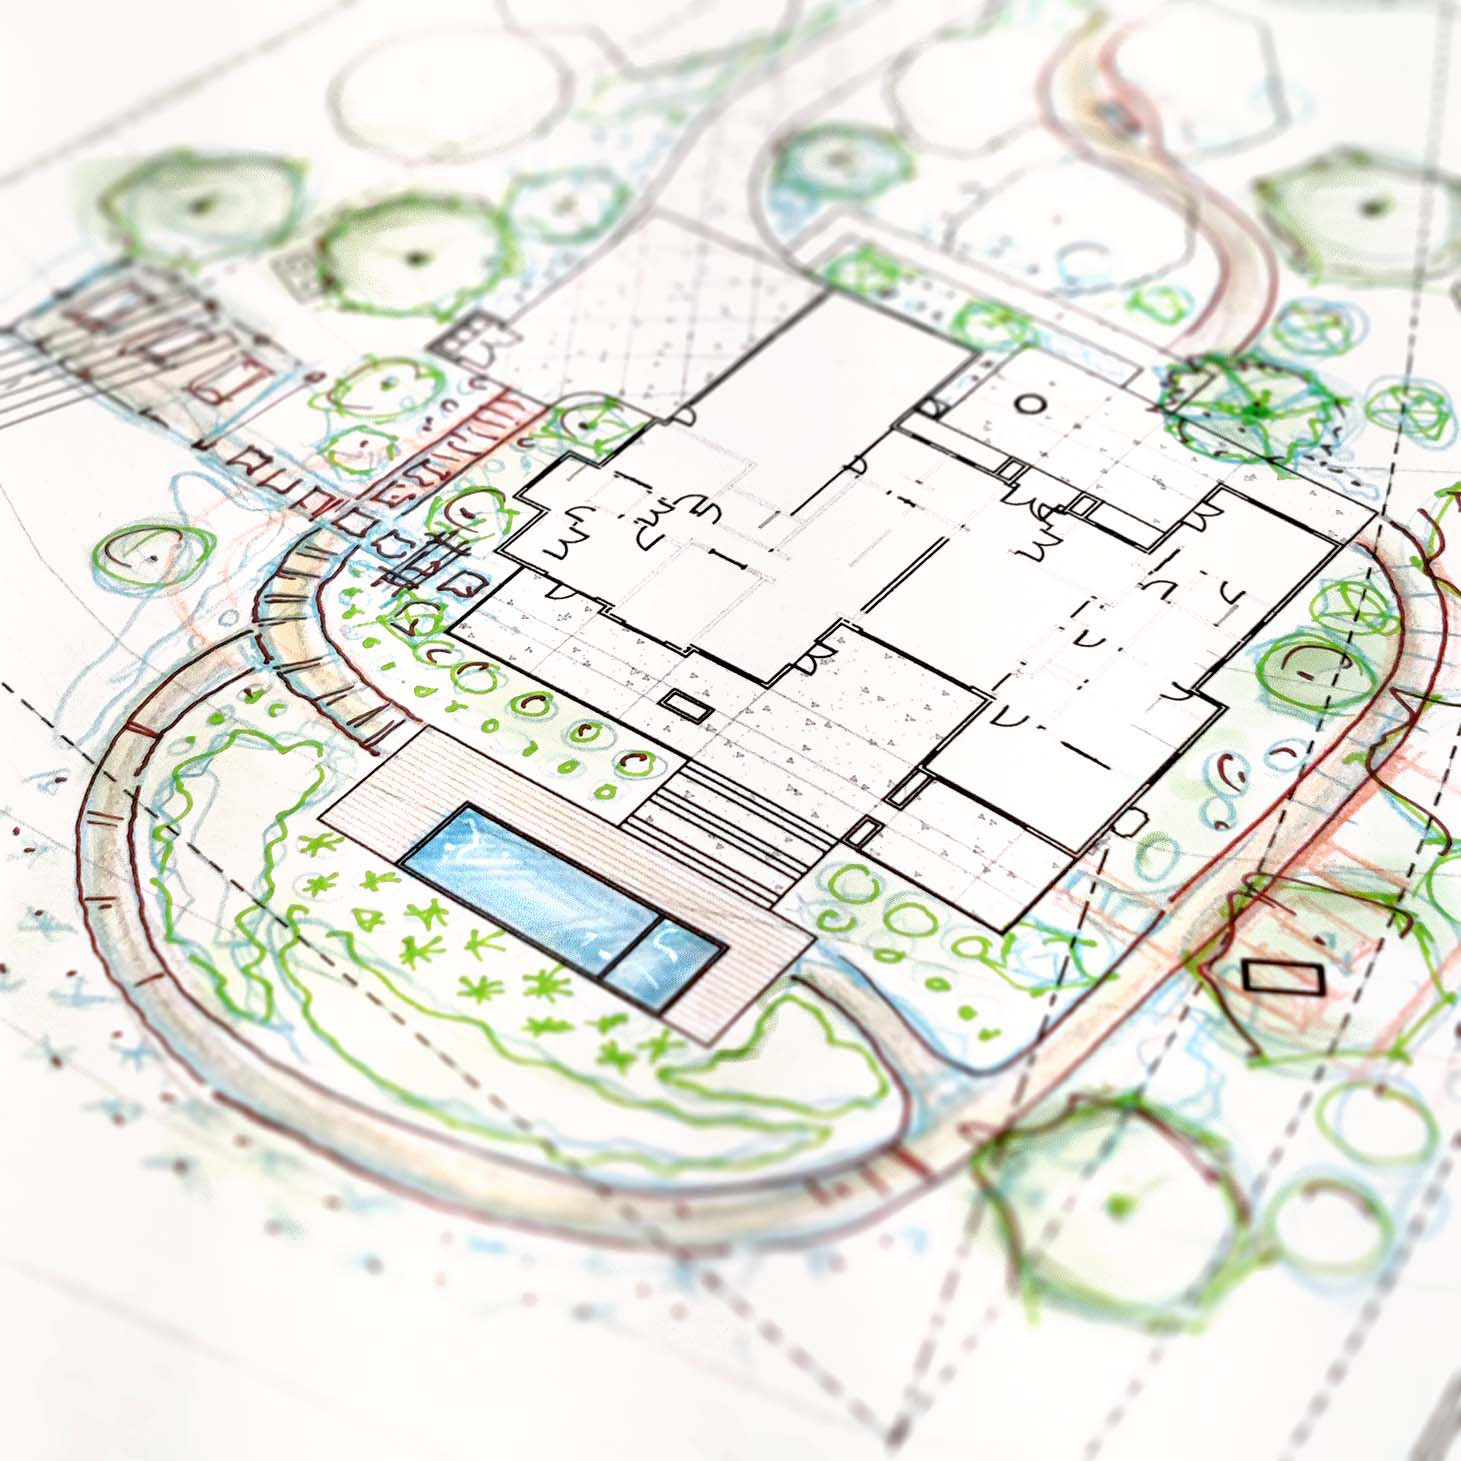
The house sits just below a small grove of valley oaks, providing an opportunity to highlight their arching structure and blend the landscape back into their shade. Lighting along the entry drive highlights the oaks and new trees, as well as providing for function, safety, and beauty in stairs at night.
Looking out over the valley is a bench is nestled underneath the existing oaks, just below the infinity edge pool. Lavenders, sages, rockrose, and grevillea provide colorful interest almost year round, while muhly and miscanthus provide a grassy backdrop and transition to native landscape.
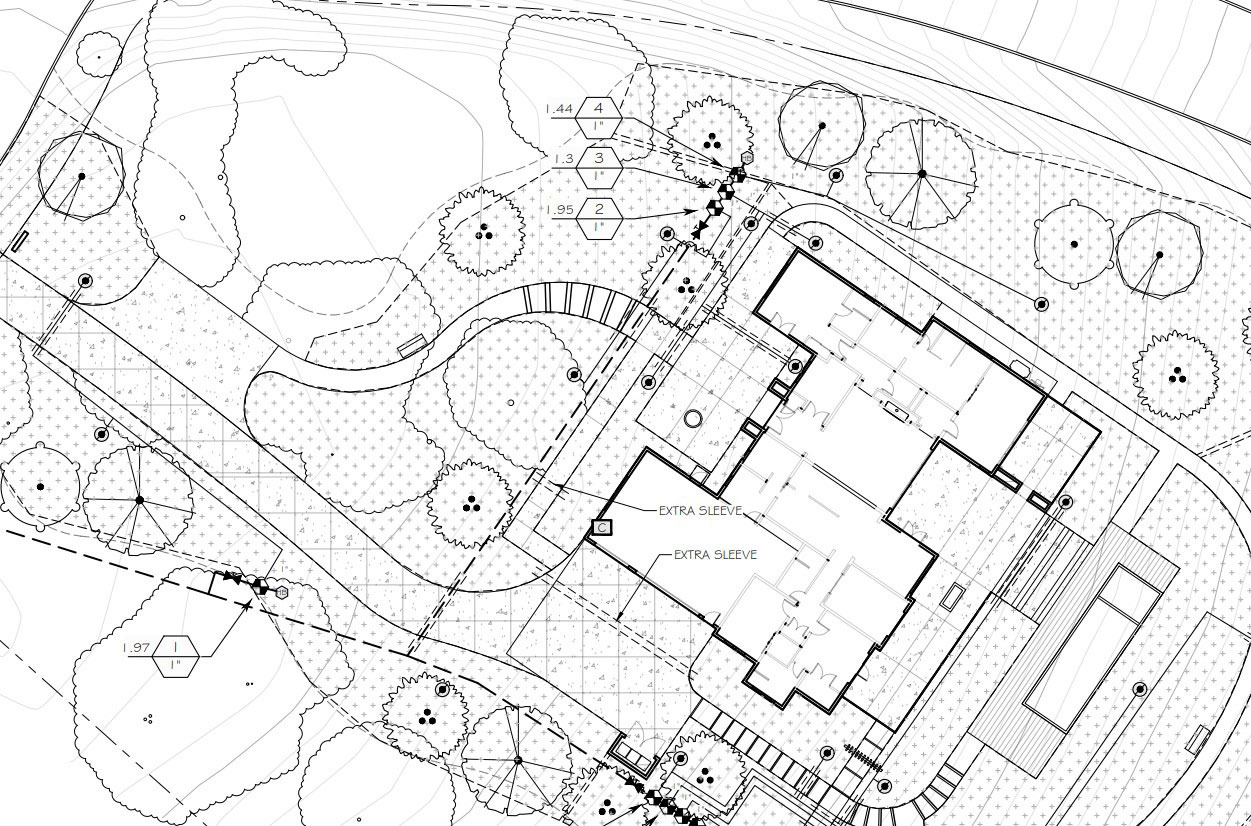
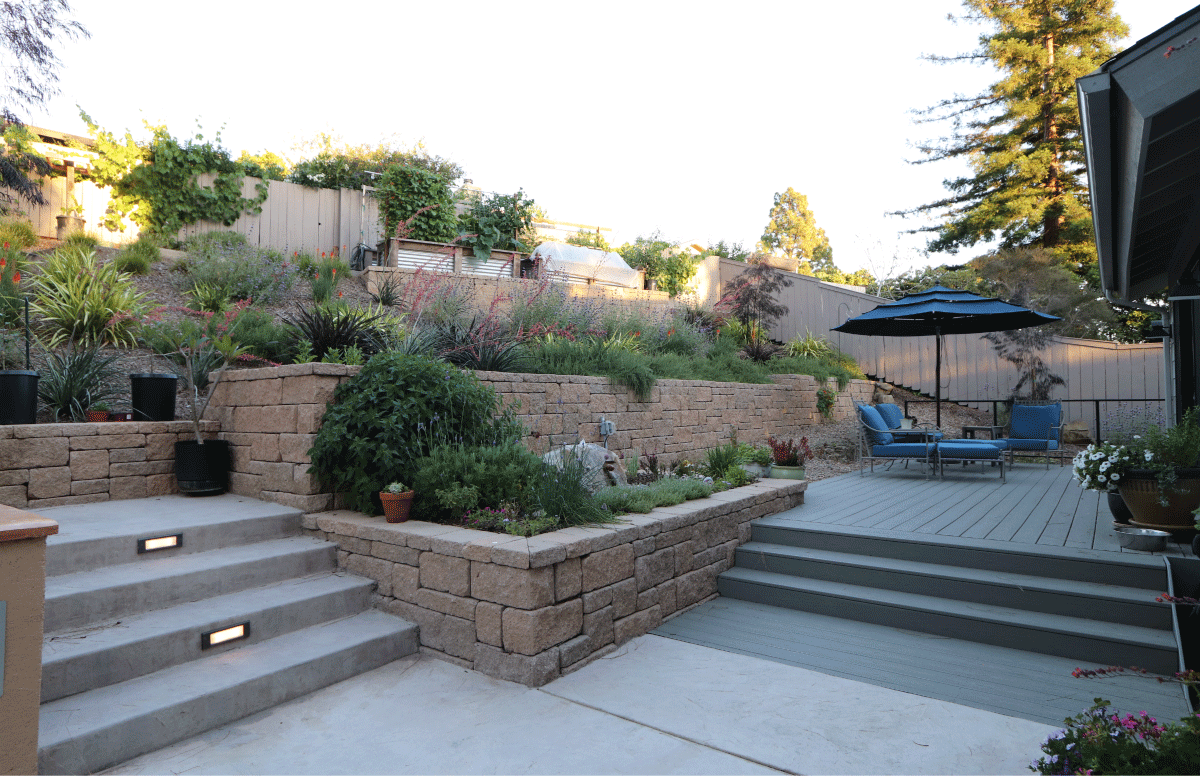
The project includes multiple levels, with a variety of stairs and steps to transition between. A fenced garden area is positioned in a sunny location near the back patio, with a network of paths connecting the garden, patio, pool deck, seating areas, entry, and parking.
Olive, bay, and sumac provide evergreen screening and color, while chitalpa offers a splash of color on a sprawling trunk. Madrone design provided planting, irrigation, and lighting plans, as well as irrigations for the California Model Water Efficient Landscape Ordinance.
Want more information on our landscape design services? Contact our landscape designers at [email protected] or (805) 466-6263.
Feb 13, 2023
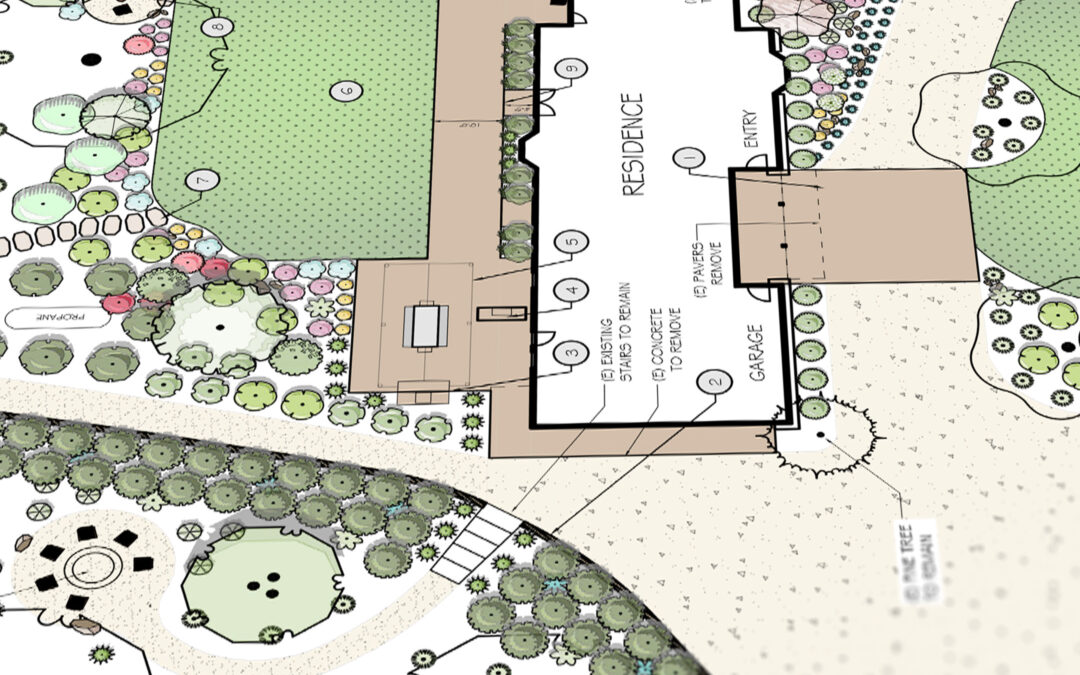
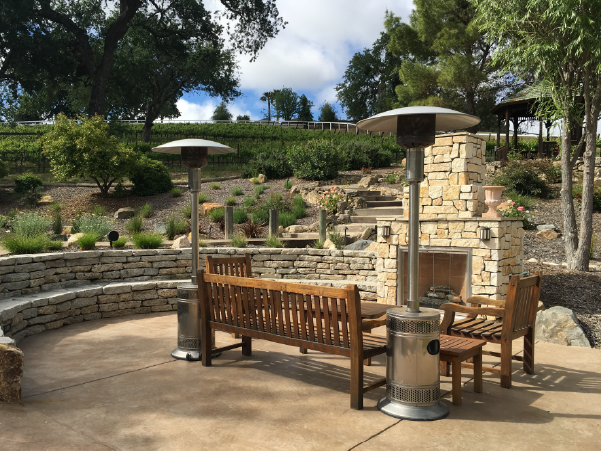
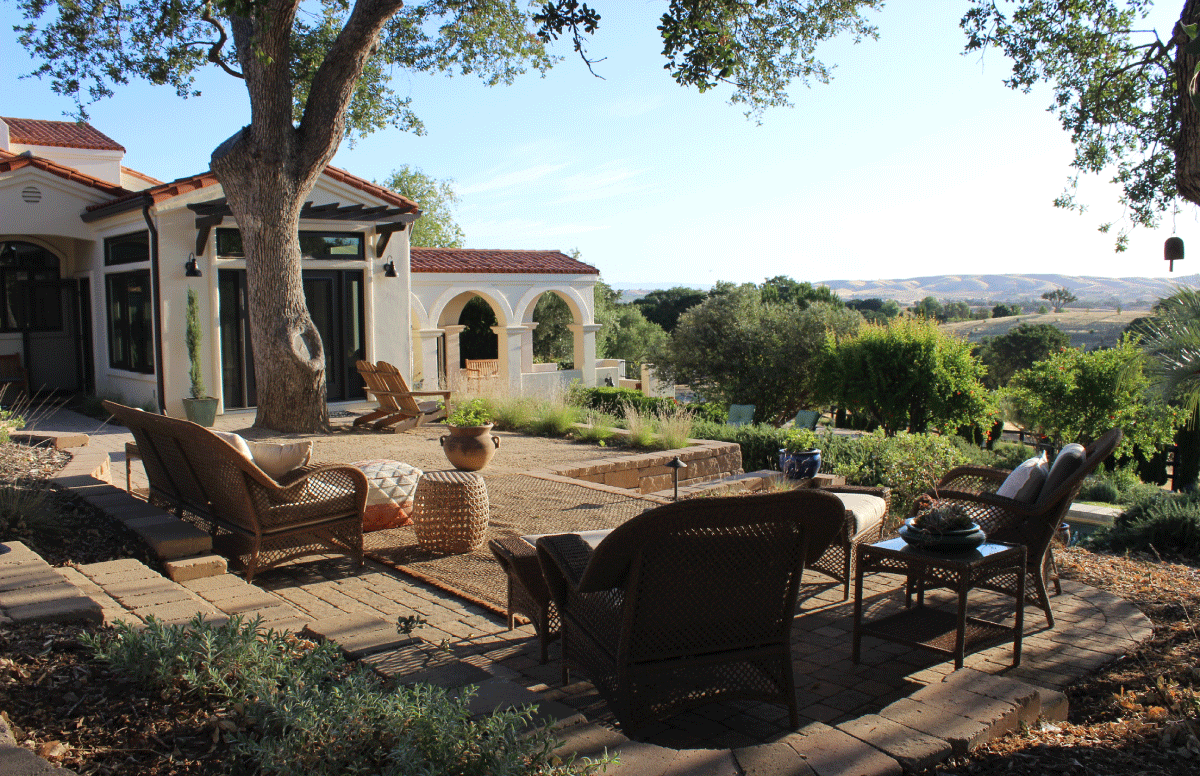
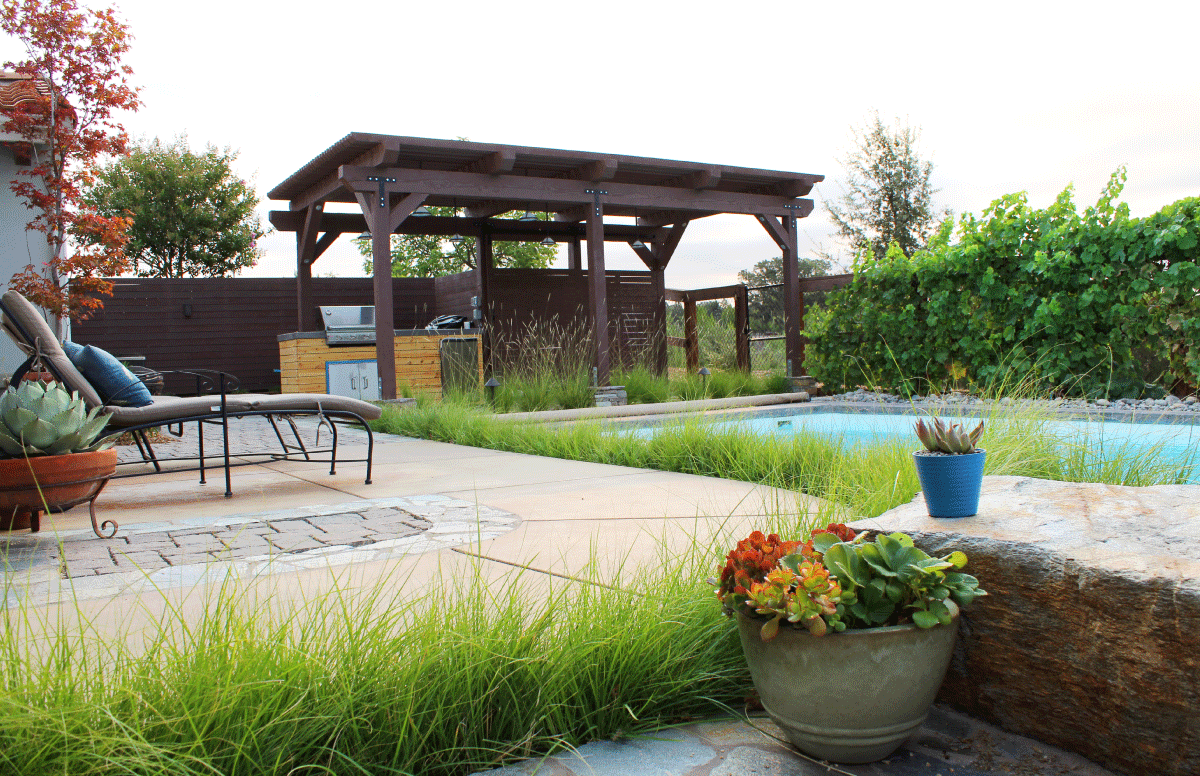
The owners of this scenic Creston ranch property requested a master plan for select areas throughout in order to improve both form and function. The goal was to keep the space as natural as possible while adding ample and varied space for entertaining and family gatherings.
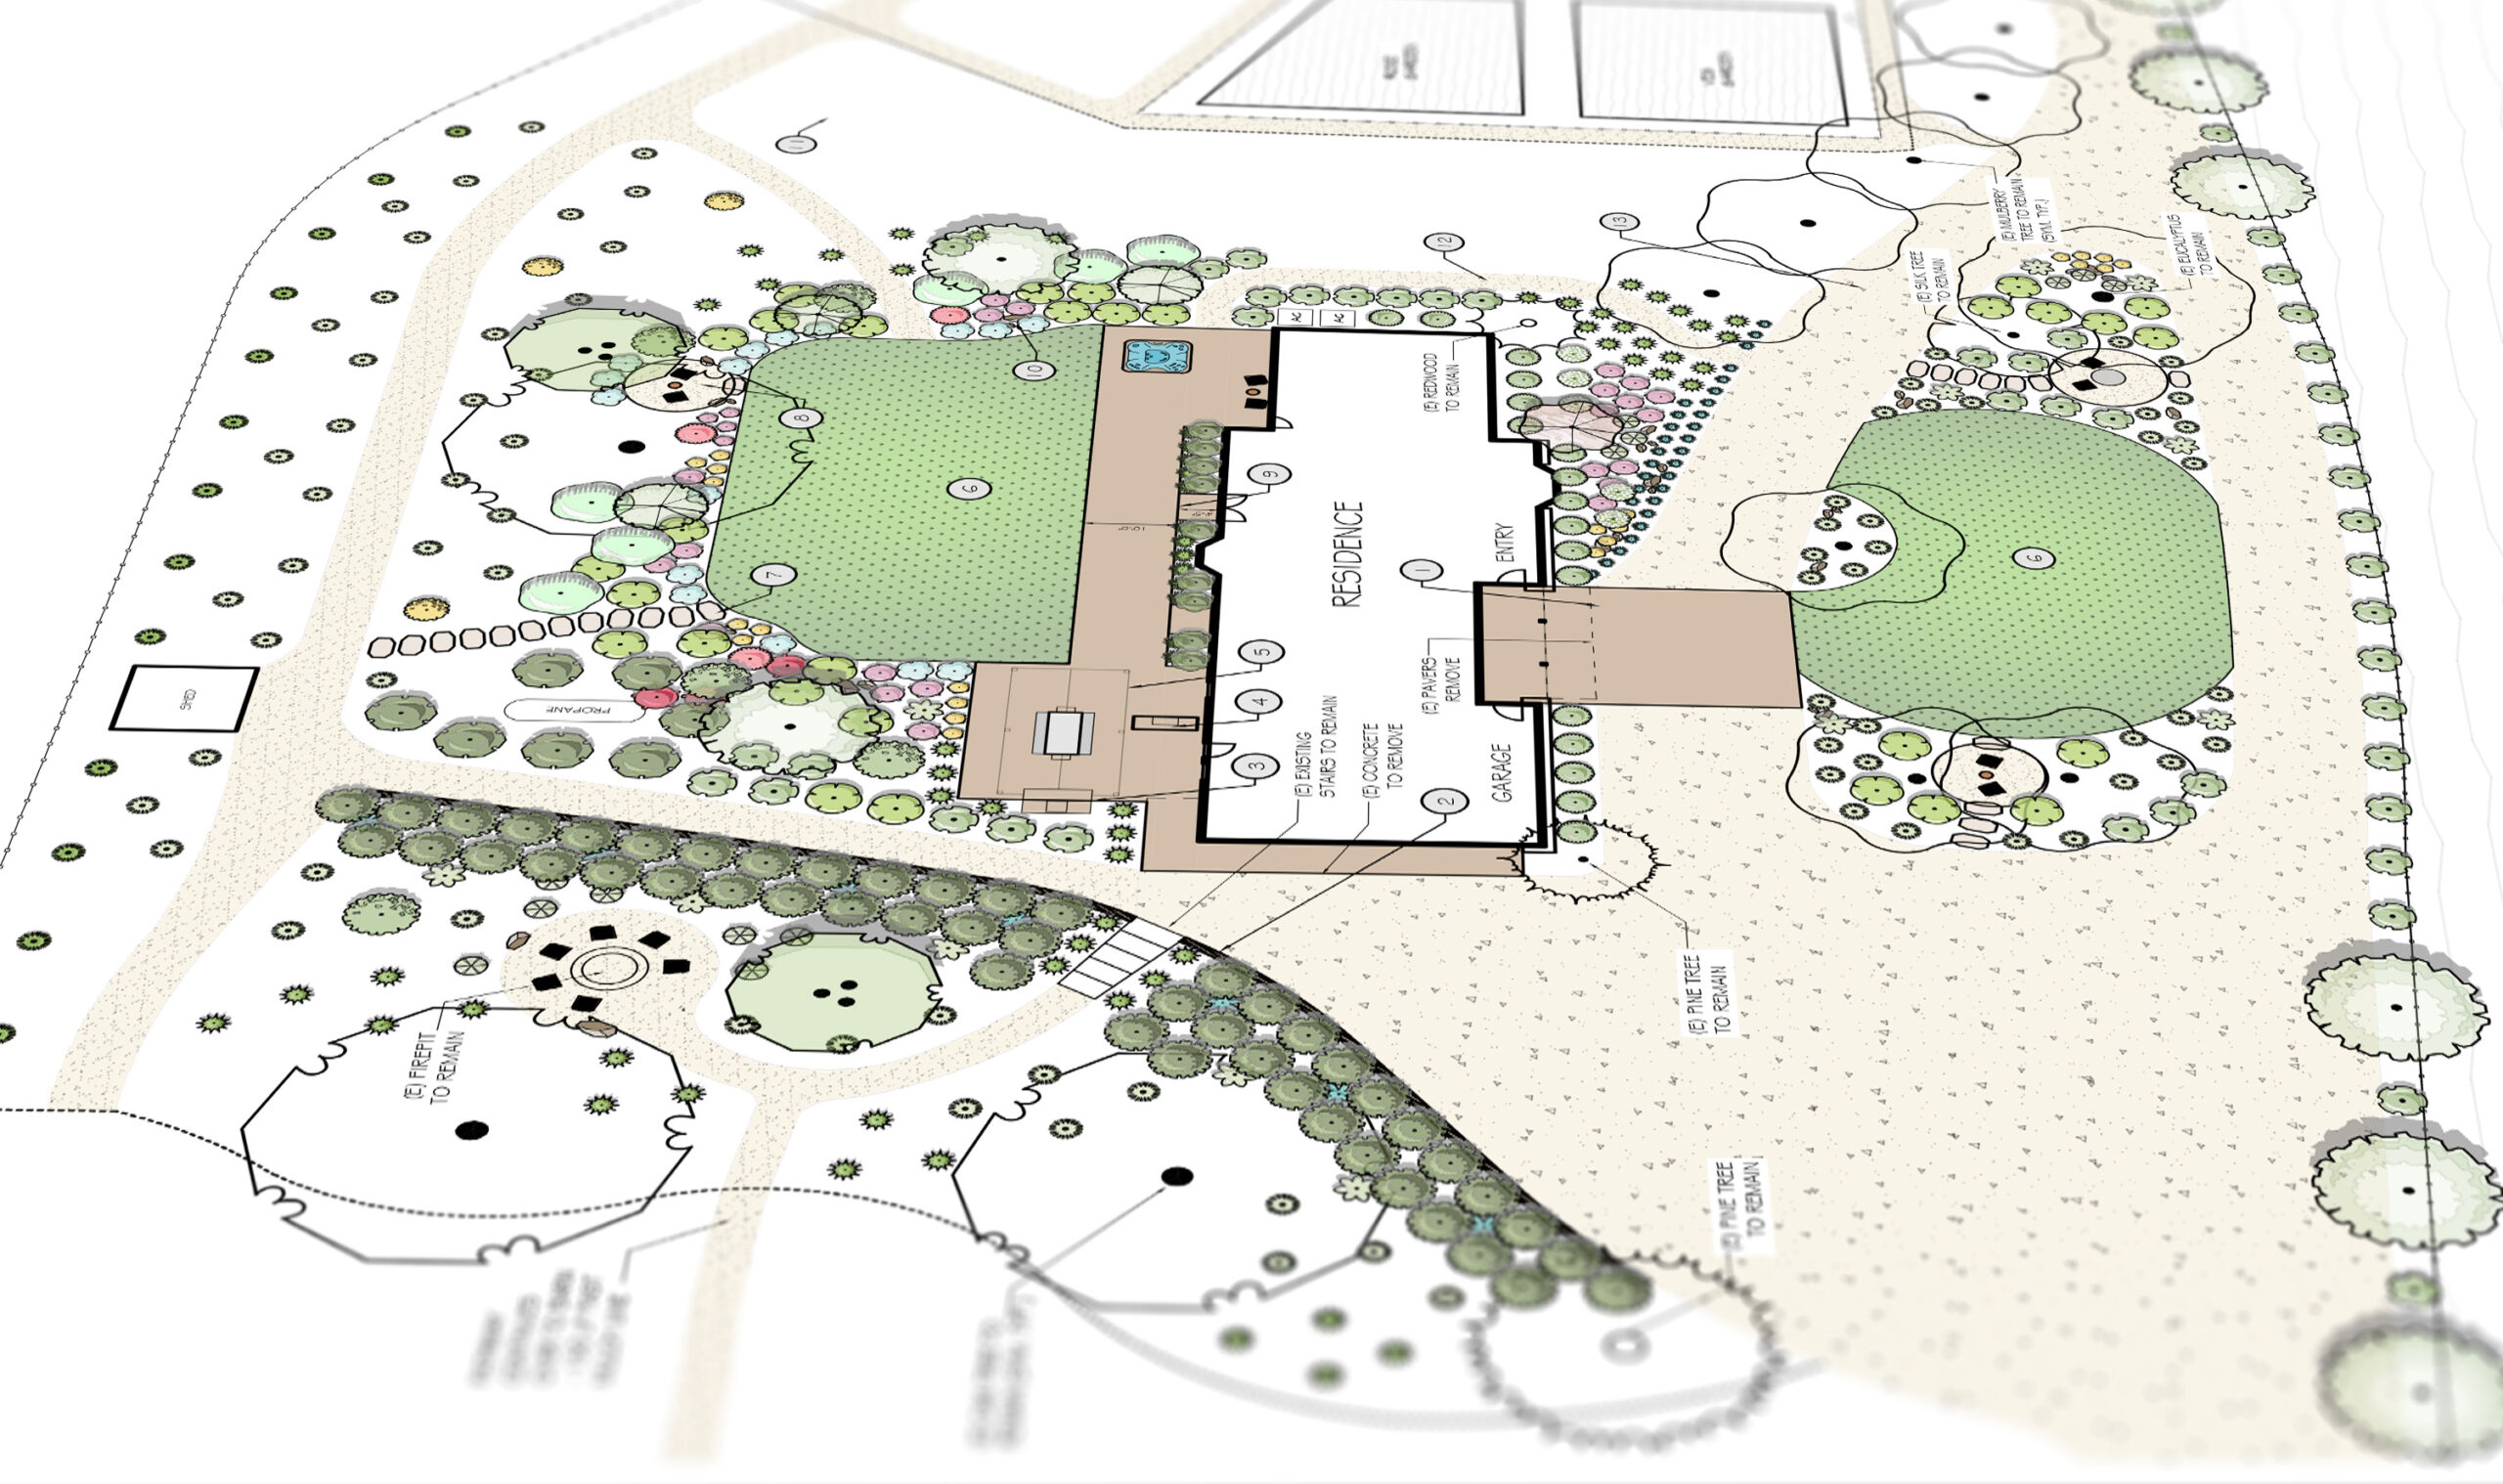
Our design focuses on aesthetics, efficiency, and usability. Key elements include eye-catching plants such as Agaves and Phlomis at the front entrance, trees and greenery along the driveway, multi-use entertainment spaces, natural stone retaining walls, and more.
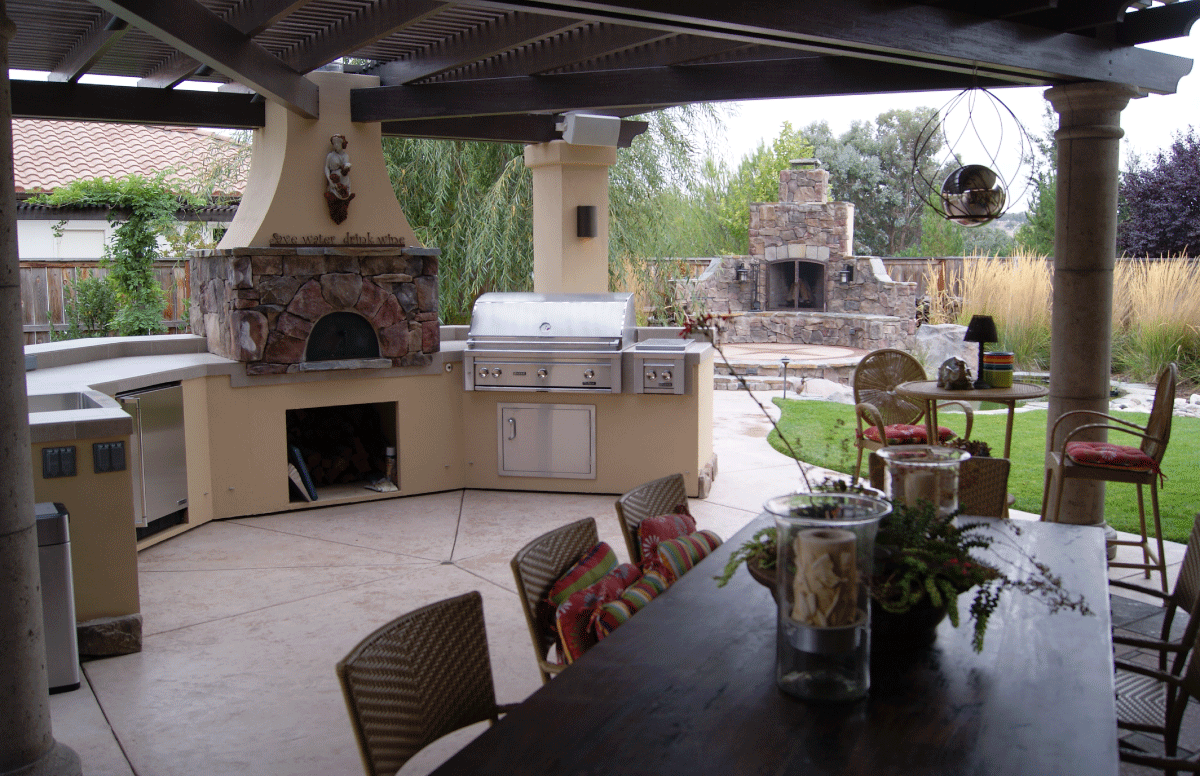
Close to the house is the main covered patio area with a stone-veneer fireplace and outdoor kitchen, space for a hot tub, and plenty of seating. Moving away from the residence, the landscape transitions to green lawn for family play, then planting space and dg paths that feather out into the natural expanse beyond. Smaller seating pockets are spread throughout the landscape in order to enjoy the views and the new landscape’s beauty.
Every plant picked achieves the owners’ desire for aesthetics while still achieving drought tolerance and low maintenance goals. The plant palette includes many Central Coast natives such as Manzanitas, Coffeeberry, Carex and Calamagrostis grasses. A re-designed irrigation system achieves maximum efficiency while the lighting plan ensures enjoyment even after dark.
Want more information on our landscape design services? Contact our landscape designers at [email protected] or (805) 466-6263.
Jan 19, 2023
Eight Winter Bloomers for the California Central Coast
During the colder months on the California Central Coast, many of our plants fall back and go dormant. Throughout the region, from inland San Luis Obispo to coastal Morro Bay and north county’s Paso Robles, central coasters love year-long landscapes. With so many beautiful bloomers that thrive in our area, we can count on flourishing flowers to take the stage during any given season.
Here are eight of our winter favorites.
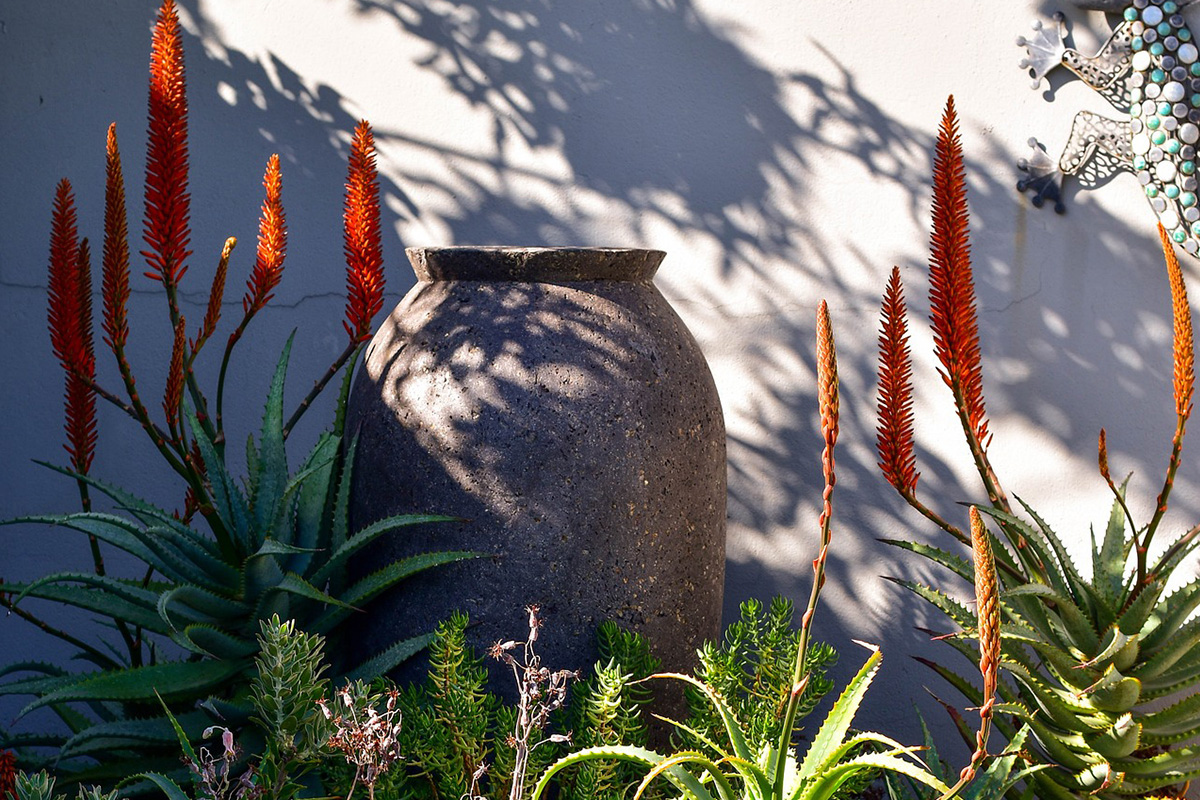
Aloe Striata
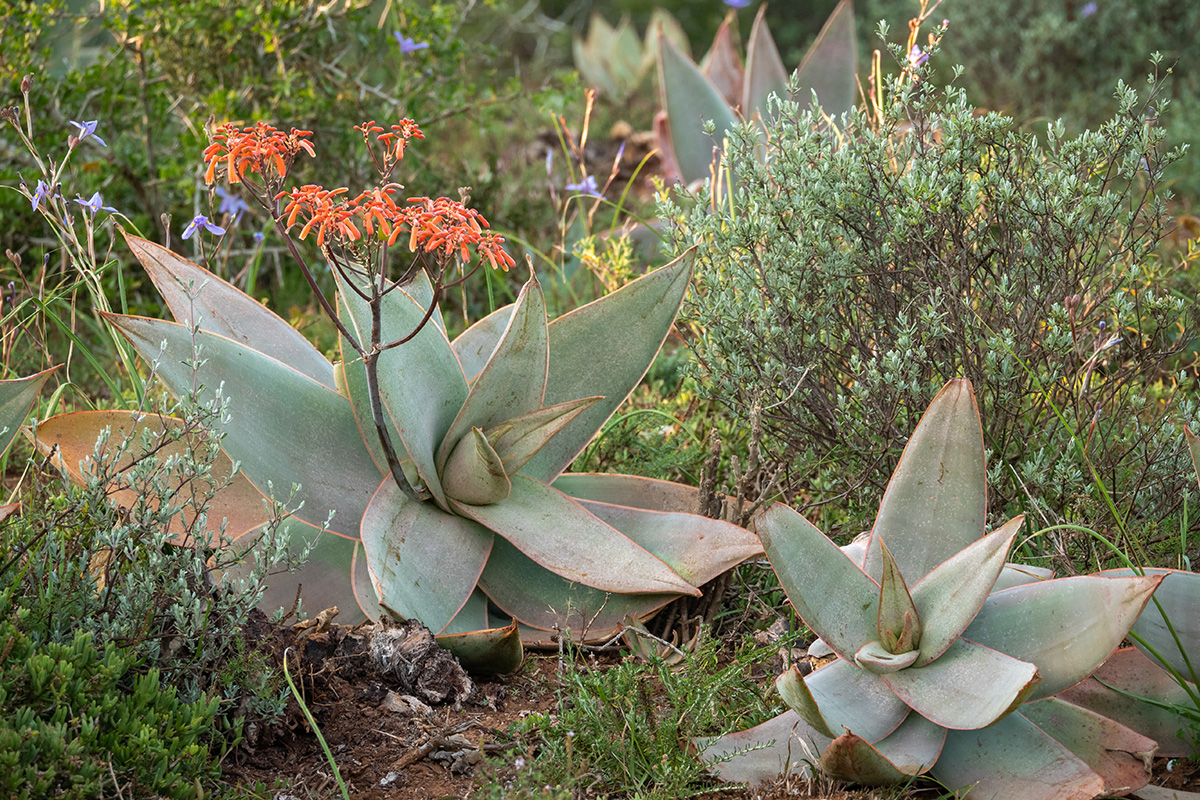
Aloe striata, or Coral Aloe, is memorable for its tall floral stalks the color range of a citrus sunset, but its leaves take the cake. Elegant and pale, their reddened edges lend a delicate blush year-round, even as it blooms in the winter.
Arctostaphylos
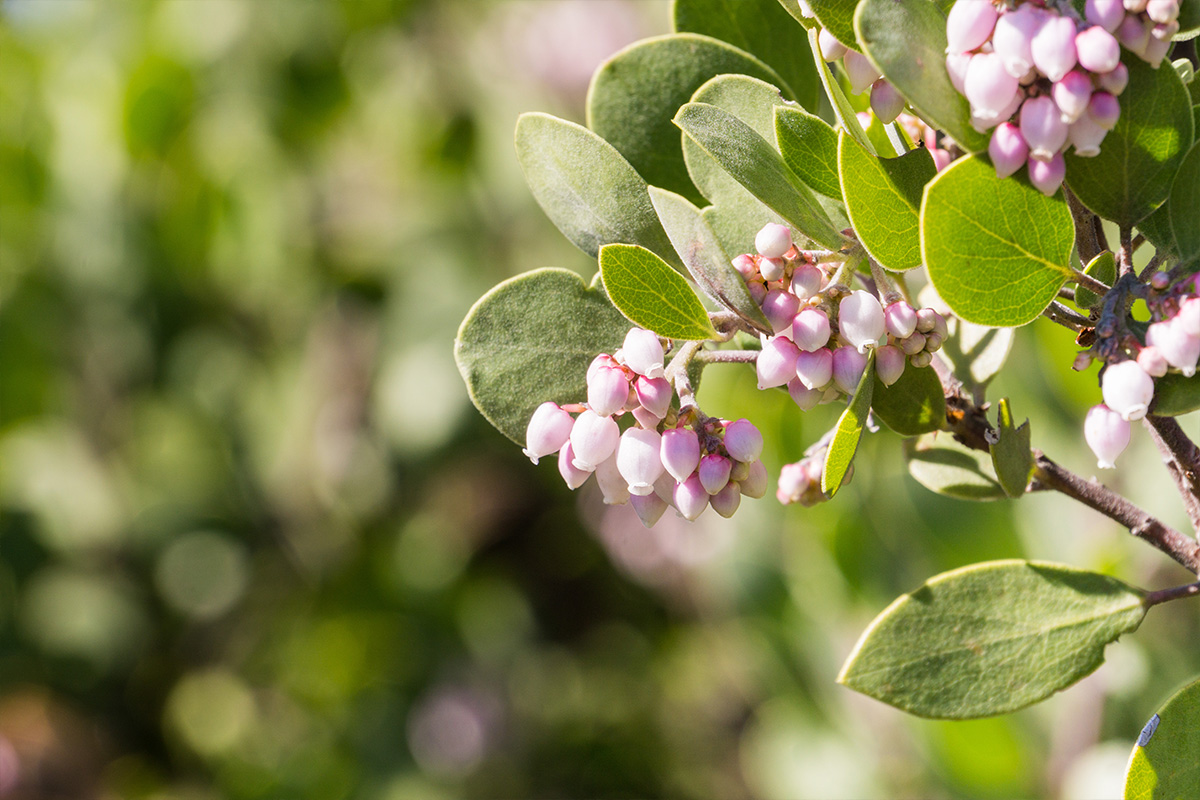
Drought-tolerant and robust year-round, these Manzanitas shrubs are popular for their handsome, red-toned bark and bunches of round, gentle flowers.
Erica Canaliculata

This showering splash of flowers is commonly known as channeled heath or hairy gray heather. Its bell-shaped flowers bloom in a cloud of pink to purple, lending waves of colorful body to every landscape it flourishes in.
Agave Attenuata
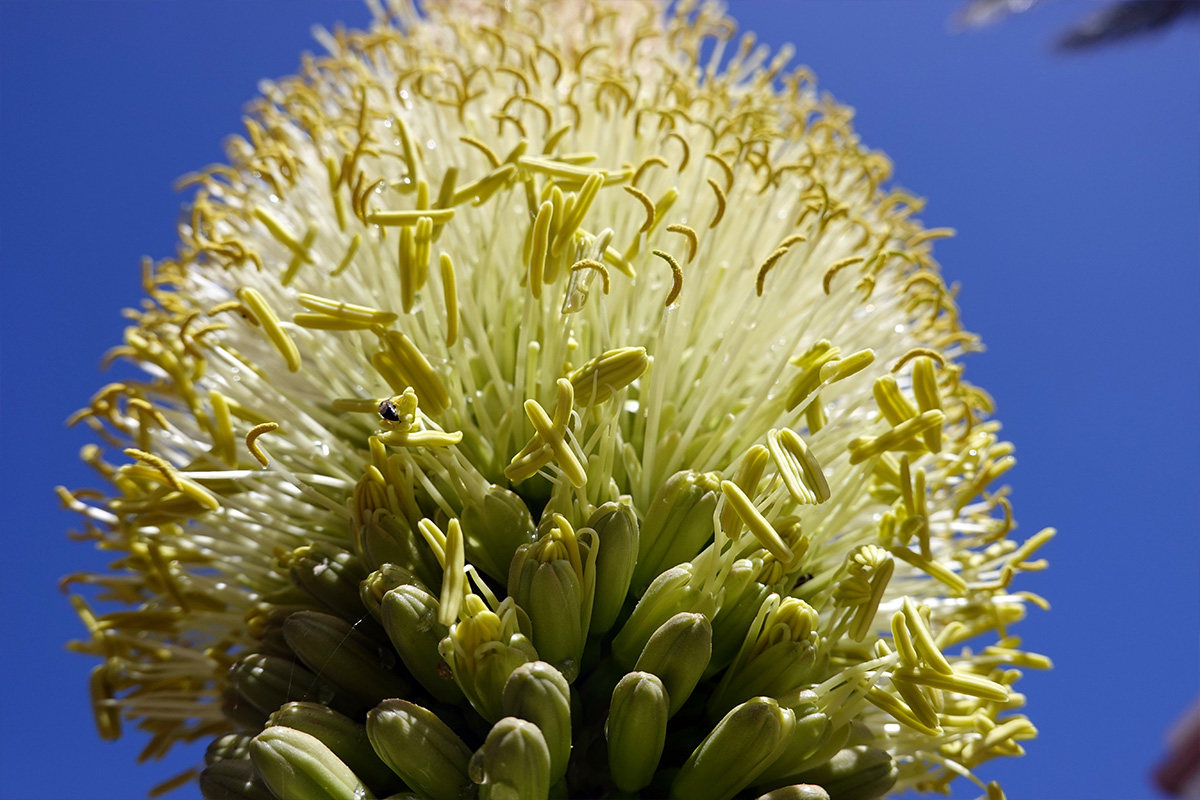
While the Foxtail Agave is typically known for its year-round architectural form and drought-tolerance, mature specimens will put out massive flower spikes once in their lifetime. Vibrant green, cool blue, and beautiful variegated cultivars are available, and will spread from basal shoots, eventually filling in a sizeable area.
Viburnum Tinus
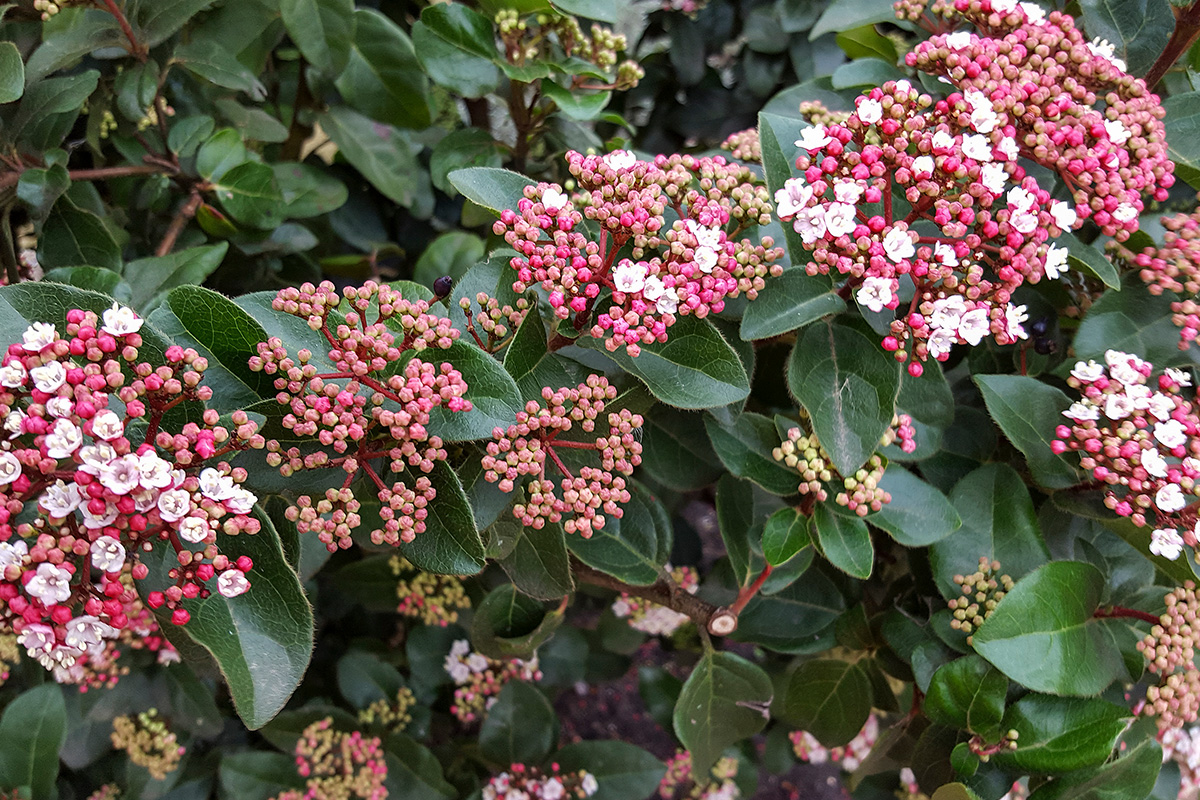
Another shrub bursting with fragrant and elegant blooms, the Viburnum tinus not only blossoms in the winter but provides a burst of metallic blue from its berries as well. It is well beloved by butterflies, bees, and clients alike..
Aloe Camperi
One of the few aloes with verdant green leaves, Aloe camperi or Popcorn Aloe, is a mid-rise plant with beautiful apricot flowers and a spindly, dramatic shape.
Grevillea ‘Moonlight’
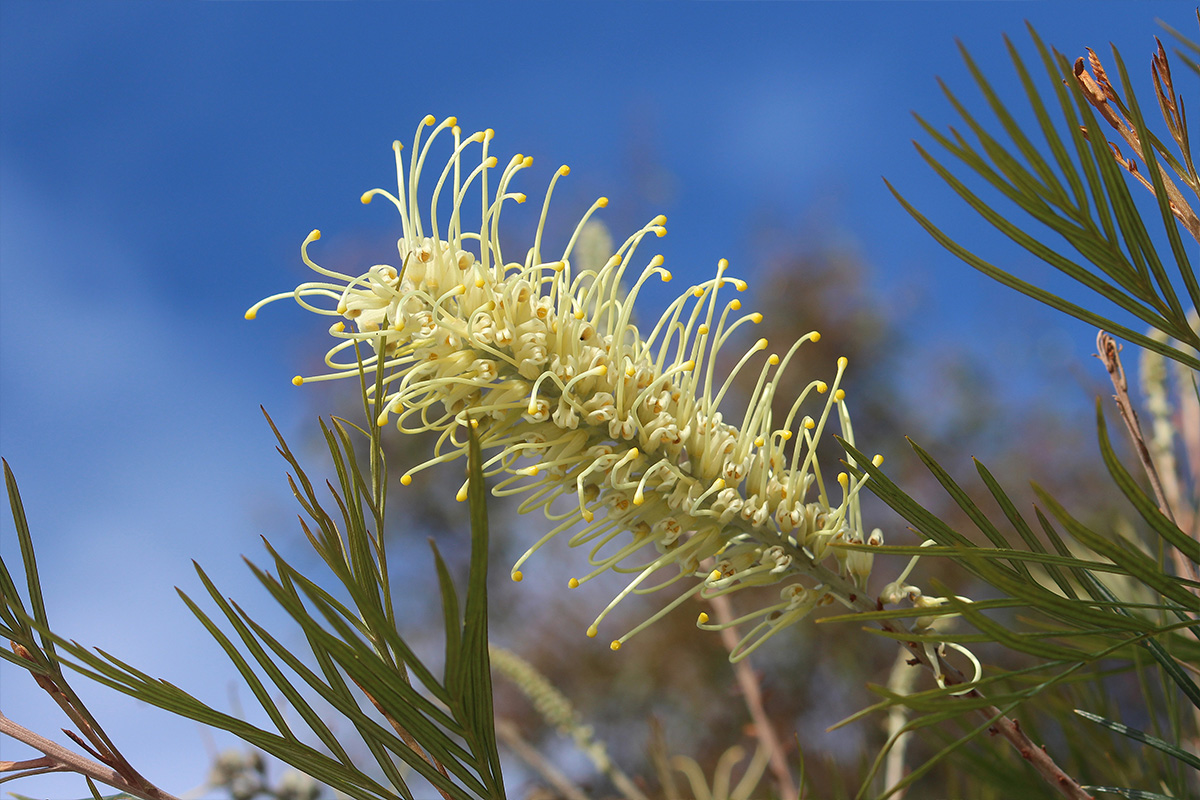
Large, fast-growing, and with lovely flowers reminiscent of loose embroidery, Grevillea ‘Moonlight’ is a bushy evergreen that brings its luminous ivory to your winter landscape.
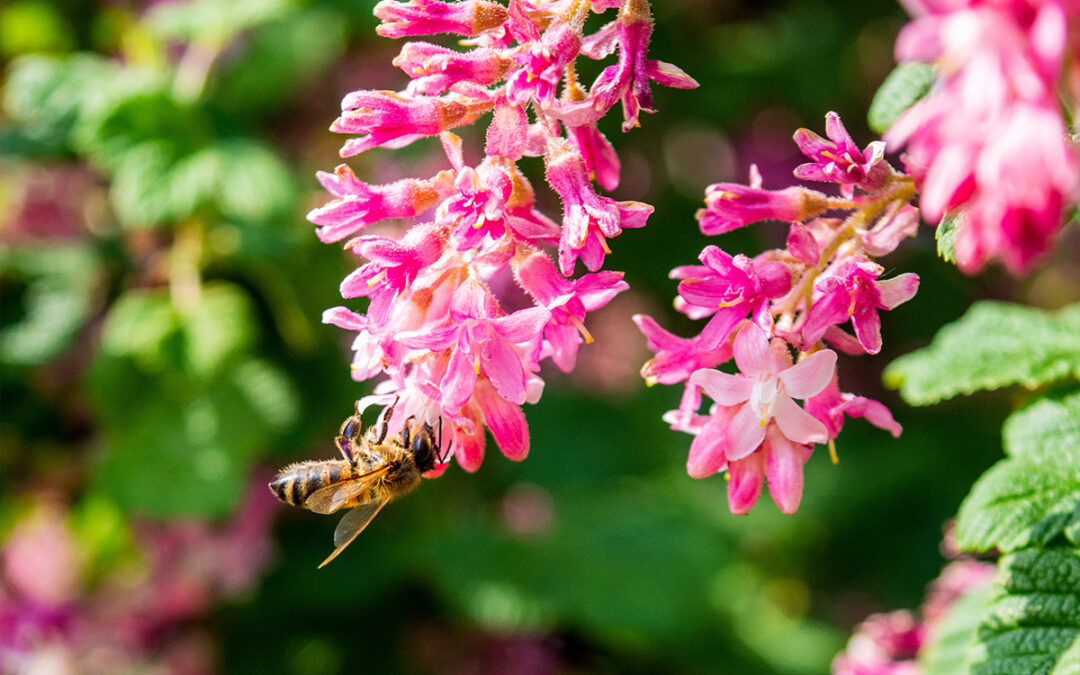
Ribes ‘Spring Showers’
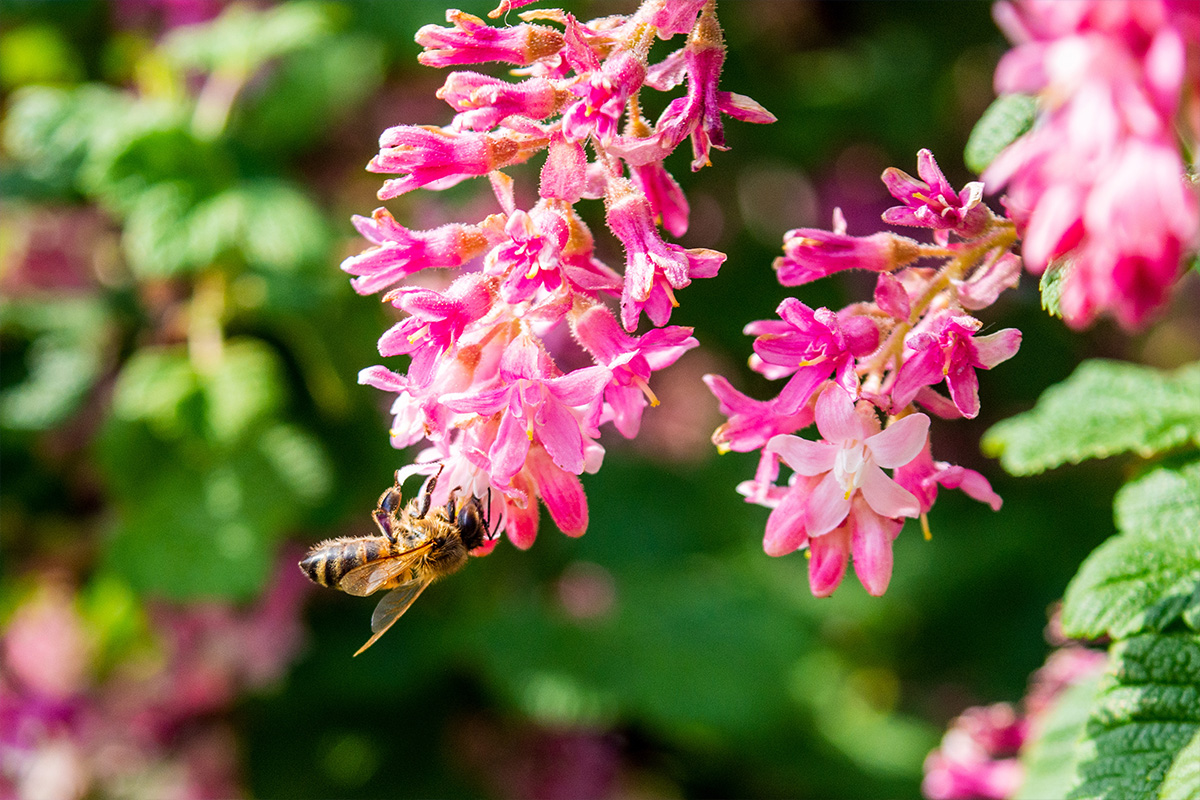
The pendulous pink flowers of this dainty plant come alive in winter, a vibrant display that can almost cover the foliage.
Looking for a landscape with plants that bloom in the winter? Talk to our landscape designers for a design tailored to your specific climate. Some of the species in this list are better suited for milder coastal climates, while others are bullet-proof even in frosty north county. Contact our landscape designers at [email protected] or (805) 466-6263.
Dec 1, 2022
Transforming a landscape can be overwhelming—there are so many places to find inspiration, and there are drastically different styles to consider. It can be helpful to work with a professional—landscape designers are trained to see the big picture and identify opportunities that elude most homeowners.
Maximize Your Residential Landscape
Written by Daniel Mazawa, General Manager
Originally published in Living Lavishly
Here are a few steps homeowners can take to understand the design process and get a grasp of what they want from their landscape:

Analyze the Site
On the Central Coast, there are several different natural backdrops that most homes enjoy. Whether it is a distant view of rolling oak woodlands or a beachfront bluff experience, it is important to understand the setting of a place as influenced by the natural world. Take stock of existing trees or plants on site as well as sun and shade.
The architecture of the home and the neighborhood aesthetic may set the tone for the landscape design style. Consider the experience of driving up to the house and walking around the yard. A guest arriving at the home should know right where the front door is and where to park. The movement around the landscape should be functional and beautiful. Where are the areas of interest? What is the flow and the circulation? Identify the opportunities and constraints in a setting before figuring out what to do.
Establish the Functions
It is easy for someone who owns a home to identify what they want, but it can be a little more difficult to define what they need. Everything takes up space, so prioritizing functions is extremely important. Figure out how much usable space is needed for parking, outdoor entertaining, open utility areas, connecting pathways, and any other high-frequency functions. Pools, hot tubs, sport courts, outdoor kitchens, vegetable gardens, and other secondary functions can be fun additions to fold in.
Consider the best locations for all functions as far as convenience, sun exposure, views, and feel. For example, both an outdoor kitchen and a vegetable garden are convenient near an indoor kitchen, but the garden wants open sunshine and the outdoor kitchen benefits from shade or shelter. Also consider the indoor/outdoor connection as perceived through windows and doors from inside. A pergola can feel like an extension of an indoor room, or a distant view can be framed to be enjoyed from inside.
Define Design Style
A good first step is to decide whether a landscape is going to be geometric and calculated or free flowing and natural. A modern home may work better with a straight-lined landscape, but these forms can deconstruct as they move away from the structure. A natural setting such as a woodland can work well with curves and natural pathways especially if preserving existing trees.
People who like control, simple bold design, or tidy surroundings gravitate towards straight lines with geometric configurations. People who like tranquility, natural settings, or designing with nature gravitate towards flowing curves. Bold Modern style utilizes straight-line end of the spectrum and Natural Style falls on the curved line end. Mediterranean, Southwestern, Cottage, and Japanese gardens fall somewhere between. Having a clearly defined style that repeats and transitions smoothly will make a landscape feel complete.

Design Spaces Before Features
While design features are important, the spaces they create are more important to the user experience. For example, a tree may be a beautiful feature, but the shade and shelter a tree grove provides can create a comfortable room complete with walls and a ceiling. Comfortable spaces are often perceived as a bit wider than they are tall, or 1 to 1.618 height to width per the golden ratio. A pergola 16 feet wide by 10 feet tall is a good example. The same comfortable feeling can be achieved with shrubs and trees.
Conversely, putting too many plants next to a front door entry can make it feel tight and uninviting. Open it up and make the path wide, prominent and inviting. Wide open views will feel more comfortable when framed with trees or from a comfortable viewing patio. The psychology of spaces can be overwhelming, but it is obvious when a space feels right.
Work Out Transitions
Landscape is the glue that holds together spaces and structures. Transitions can be the most dynamic aspects of a landscape, or they can be eyesores. Complex hardscape features such as patios, retaining walls, fences, pergolas, outdoor kitchens, water features, and fire features will often intersect and connect with one another.
Figure out how connections will work to make a seamless transition point. Formal landscapes will often transition to a natural area. Utilize decorative bunch grasses on the edge of the landscape to blur the line between mulched landscapes and natural areas. When utilizing multiple design styles, create transitional landscapes to blend gradually. For example, a contemporary landscape may transition to a natural area going from straight lines to calculated arcs and then to a curved path.
Iron Out the Details
Details in the landscape should emphasize the overall design style and theme. In most cases, color themes should be complementary, so they don’t clash. Choose colors for concrete, stone, wood, paint, mulch, and plant material that paint a picture that goes together.
Textures should also be considered. Fine texture details such as exposed aggregate concrete, small ledge stone, or small plants can feel lost in a large space. Bold coarse texture details like large boulders or big leaved plants can feel overbearing in small spaces. Perennial plants provide color, texture, and movement.
Plants should fit the design style with color as well as layout. Bold masses of plants work well with contemporary landscapes, while multi-species combinations can work well with natural areas. Finishing details can make the difference between a hodge-podge yard and a cohesive landscape.
There is a lot to think about when trying to maximize a landscape. A professional can help. Landscape designers can take ideas and dreams and turn them into a buildable design. Knowing the process before starting design or construction can be invaluable to being able to communicate goals and expectations to create a successful landscape to enjoy for years to come.
Ready for a landscape design and not sure where to start? Contact our landscape designers at [email protected] or (805) 466-6263.
Nov 30, 2022
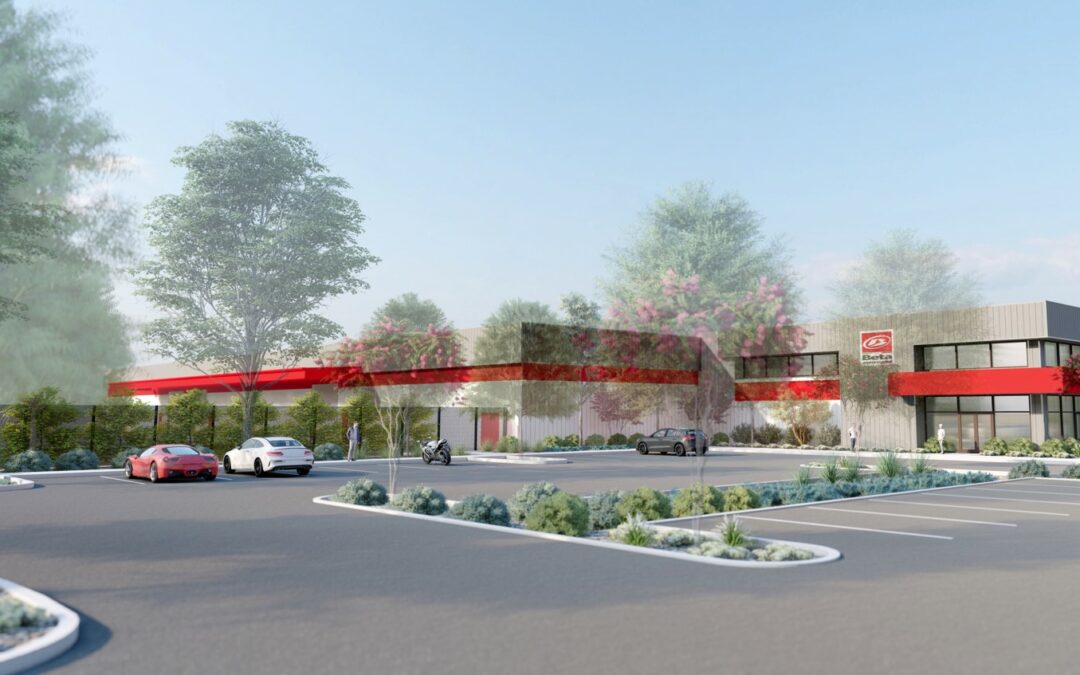
Madrone was hired to design a low-water landscape and irrigation plan for a new commercial building on an existing half-acre empty lot in Paso Robles. The placement of trees and shrubs was critical to creating an appealing front entry and visual screen for the sizable building.
Native plant species were selected for year-round interest with low maintenance requirements. Tree plantings were arranged to enhance views toward the building entry, screen certain areas, provide seasonal interest, and shade during summer months. The company color, visible in a band on the building, has been reflected in seasonal color accents within the landscape.
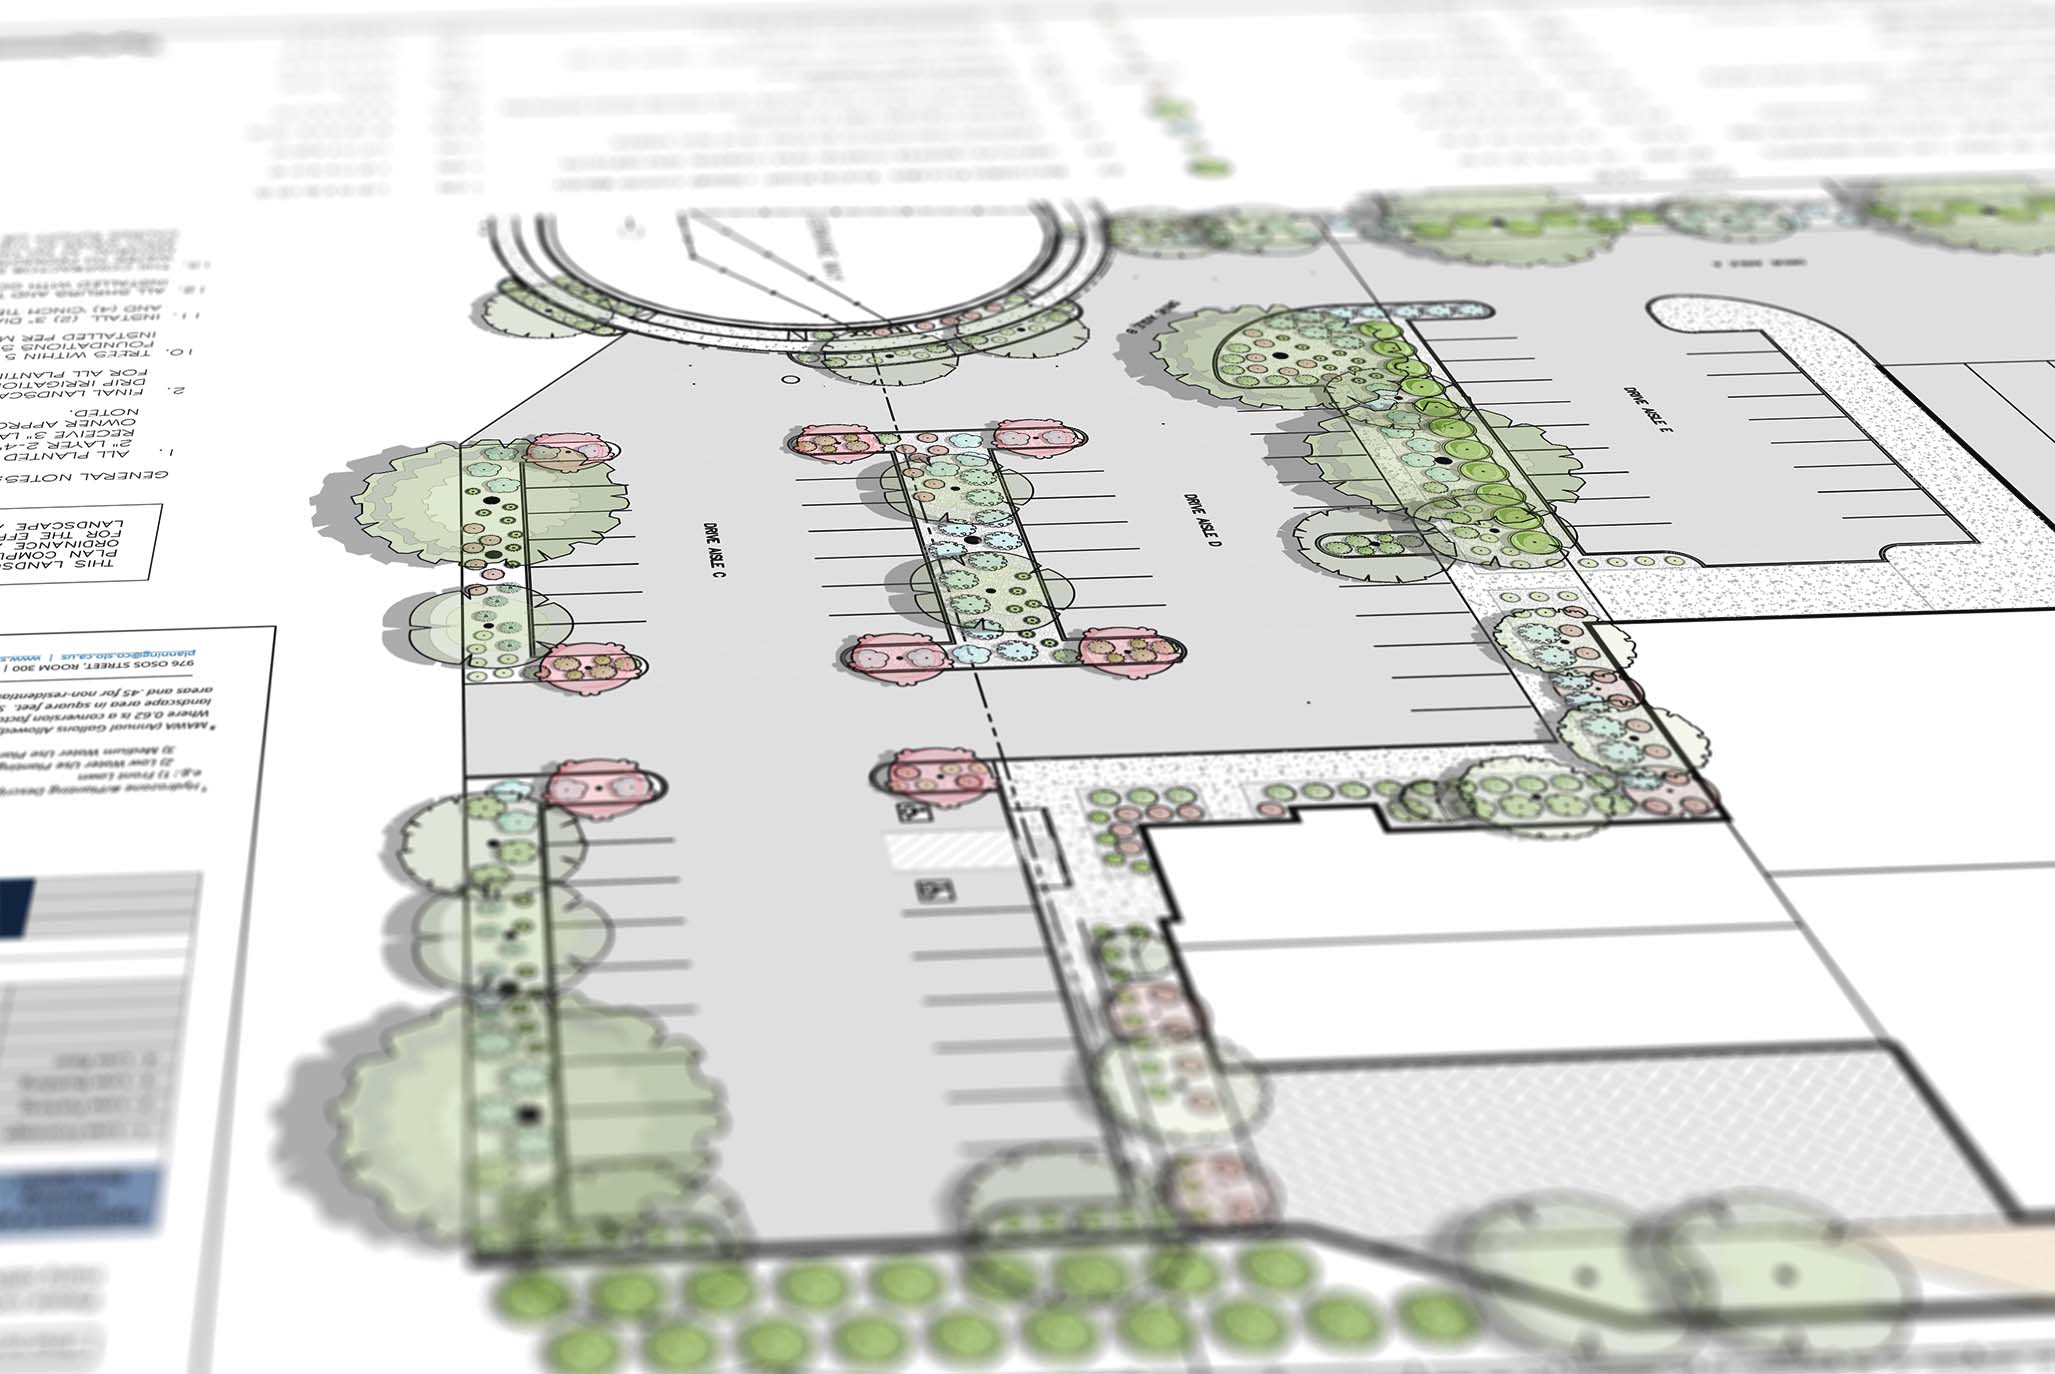
As part of the design package, Madrone created a 3D landscape rendering to visually communicate both the landscape and proposed structure.
Want more information on our landscape design services? Contact our landscape designers at [email protected] or (805) 466-6263.
Nov 17, 2022
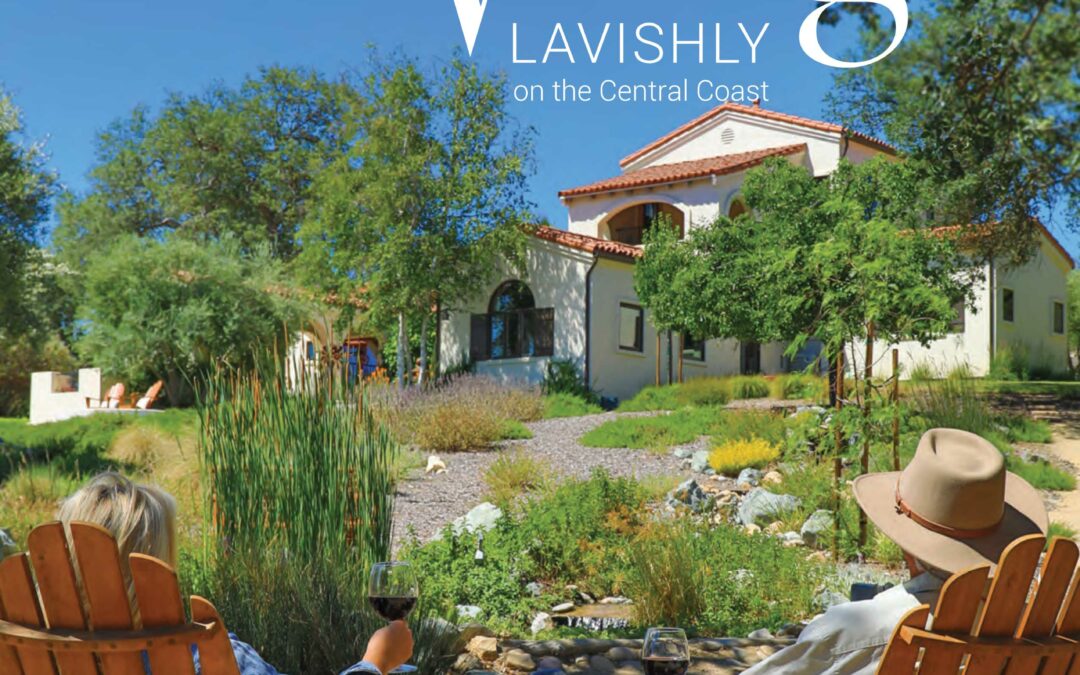
We are honored to have worked on this beautiful property, highlighted in the Living Lavishly Fall/Winter 2022 Issue. https://livinglavishlymag.com/
Oct 26, 2022
A collaborative project with Signum Architecture and Pederson Construction, Clos Solene Winery’s tasting room area is in its design phase. With multiple indoor-outdoor rooms and access to a new wine “cave” built into one of the winery hillsides, the project is coming together with structure and poise.
Our job has been focused on plans for planting, irrigation, lighting, and hardscape decomposed granite areas, all while giving careful attention to beautiful views. Everything is oriented along vine rows with sight lines maintained over a foreground of waving grasses.
With an emphasis on flow from space to space, the main walkways from the parking lot and the cave intersect at a junction with a water feature and lush grasses, the plant layout forming a smooth transition between architectural spaces.
Clos Solene’s many nooks mean precise planning and placement of various plants in our native and mediterranean palette—from the perfect tree for a narrow planter to low-growing grasses softening the central corridor. The plan is coming together with exciting promise and a beautiful payoff.
Want more information on our vineyard design services? Contact our landscape designers at [email protected] or (805) 466-6263.
Sep 21, 2022
Guidelines for Illuminating Your Outside Living Spaces
When choosing outdoor landscape lighting for any area, first think about how you will use the area. Do you want to see an ambient space out your window? Does it need to be easily walkable at night? Will you be holding al fresco dinner parties? Would you like an open-air dance floor? Do you want a cozy nook for a nightcap around a fire pit?
If you have one activity in mind, you can keep the lighting simple with a single switch for all lights. If you want to use your space for several activities, you may want options. To diversify your landscape lighting, you can arrange it into different switched zones, creating flexibility in how the space feels at night. Here are five different ways to customize the lighting for your outdoor spaces.
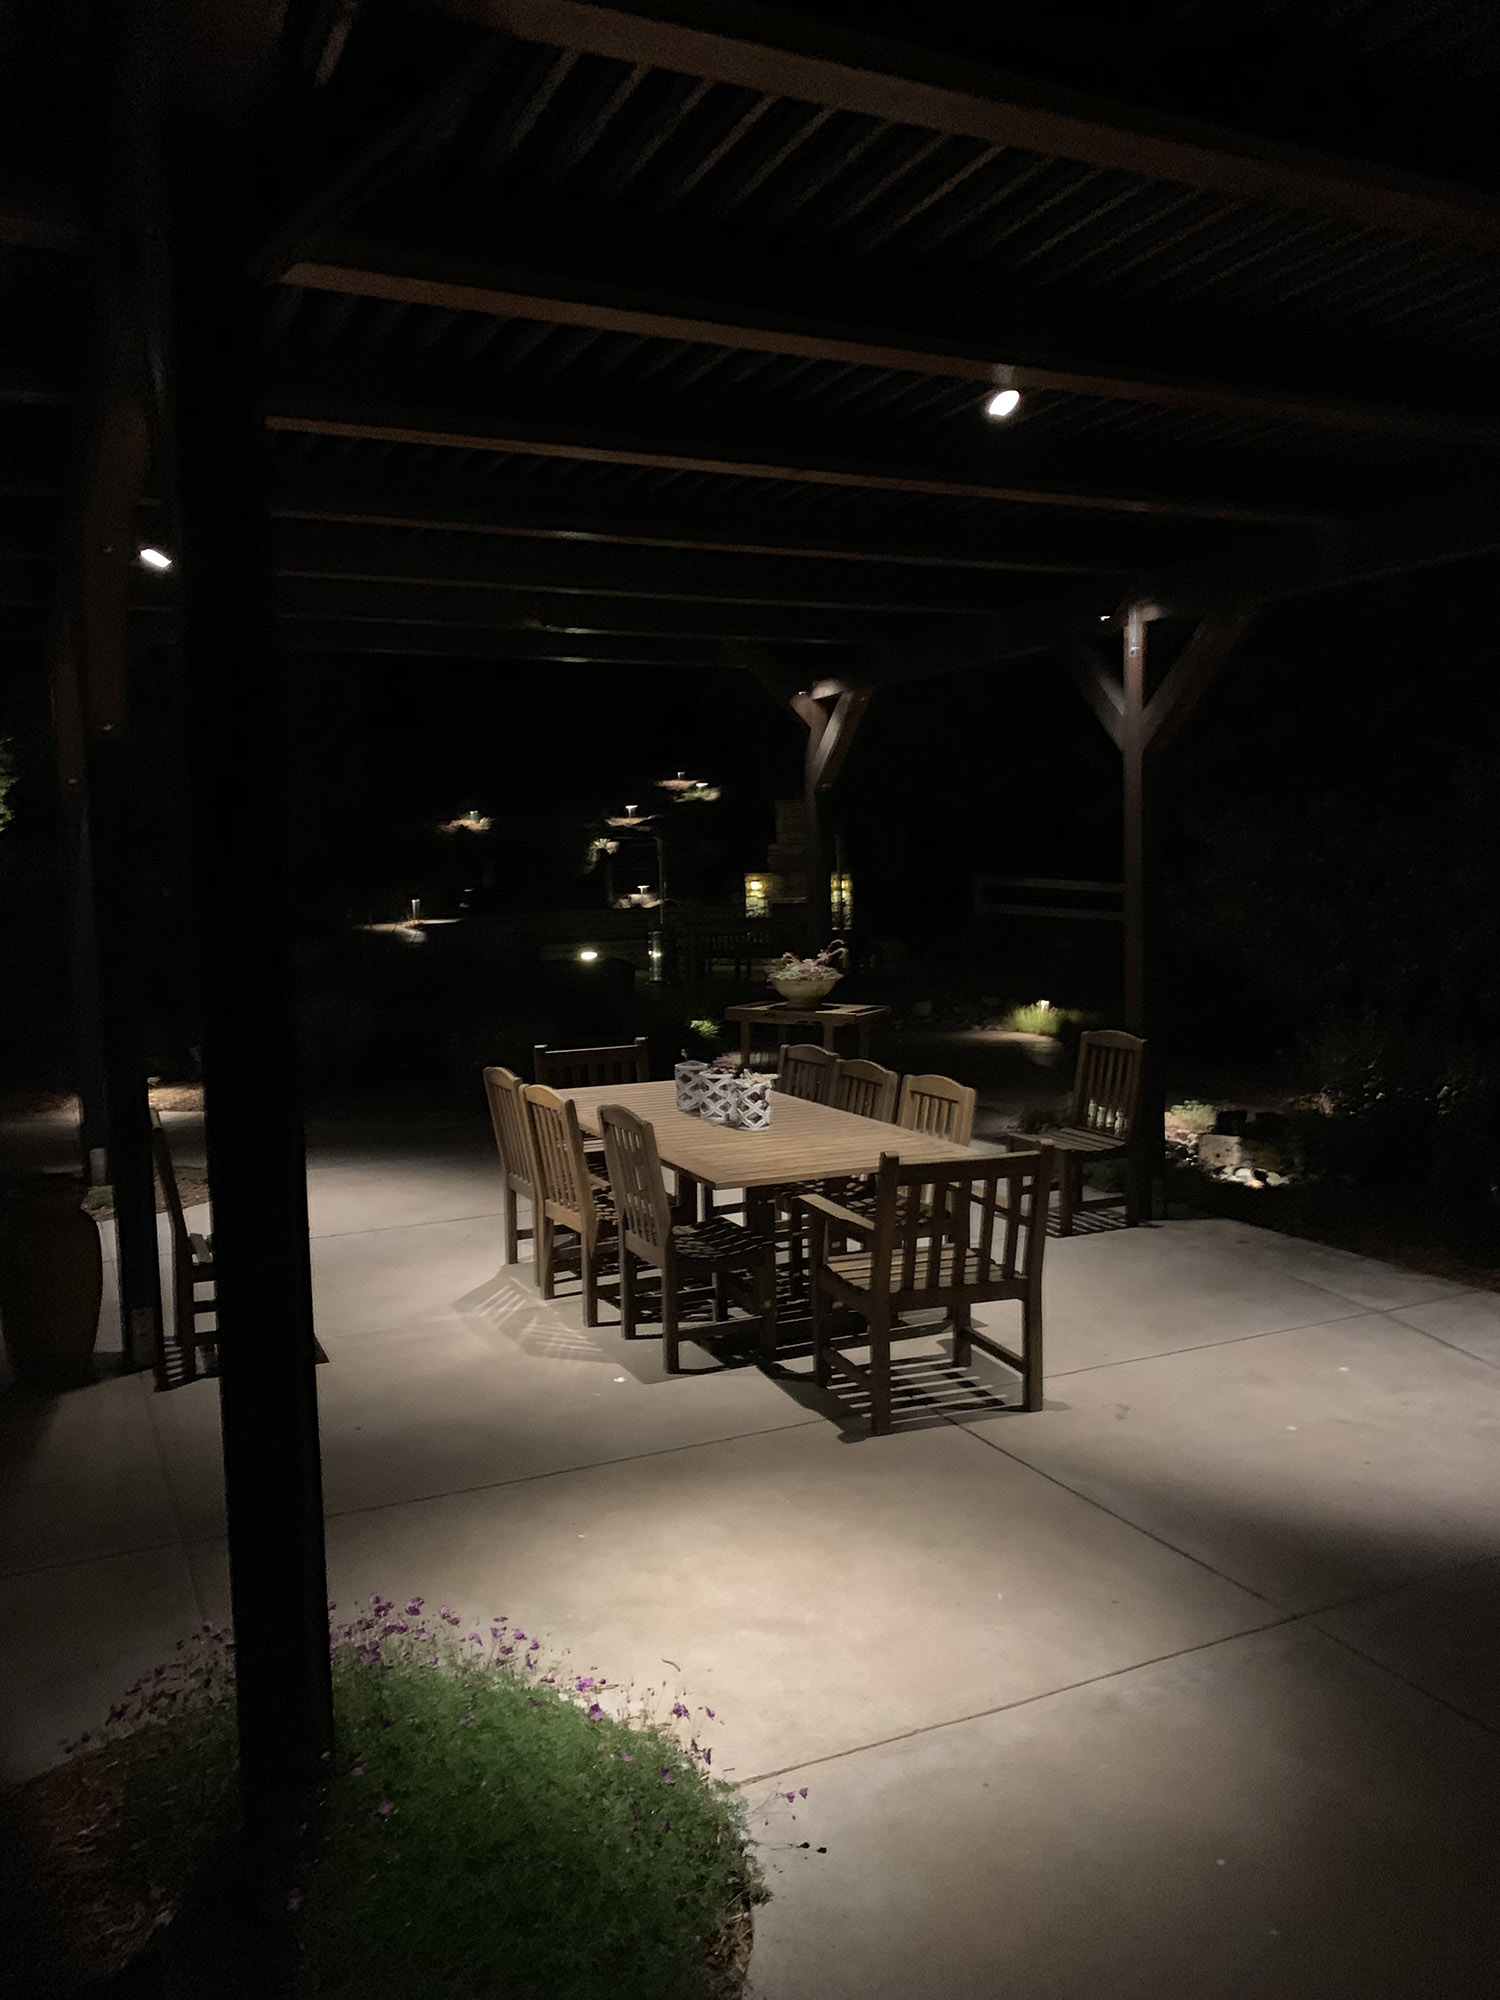
1. Provide Functional Light
In ancient times, sailors preferred dim light to eat their hardtack in ship galleys to avoid seeing their not-so-enticing food. Nowadays, you will likely want to show off your entire spread, and see your guests. Downlights, or directional spotlights with bright light, can be mounted on pergolas, walls, or trees to provide light directly to a table. For these zones, it is essential to provide more lumens with higher wattage lamps.
Suppose you want to provide illumination for safe walking. In that case, you can use path lights elevated on posts to cast broad light over walking surfaces. It is imperative to provide clear, direct lighting to stairs and precarious edges of patios. If you are building a new space, you can put recessed lights in the flatwork and riser lights in steps to provide illumination right where you need it.
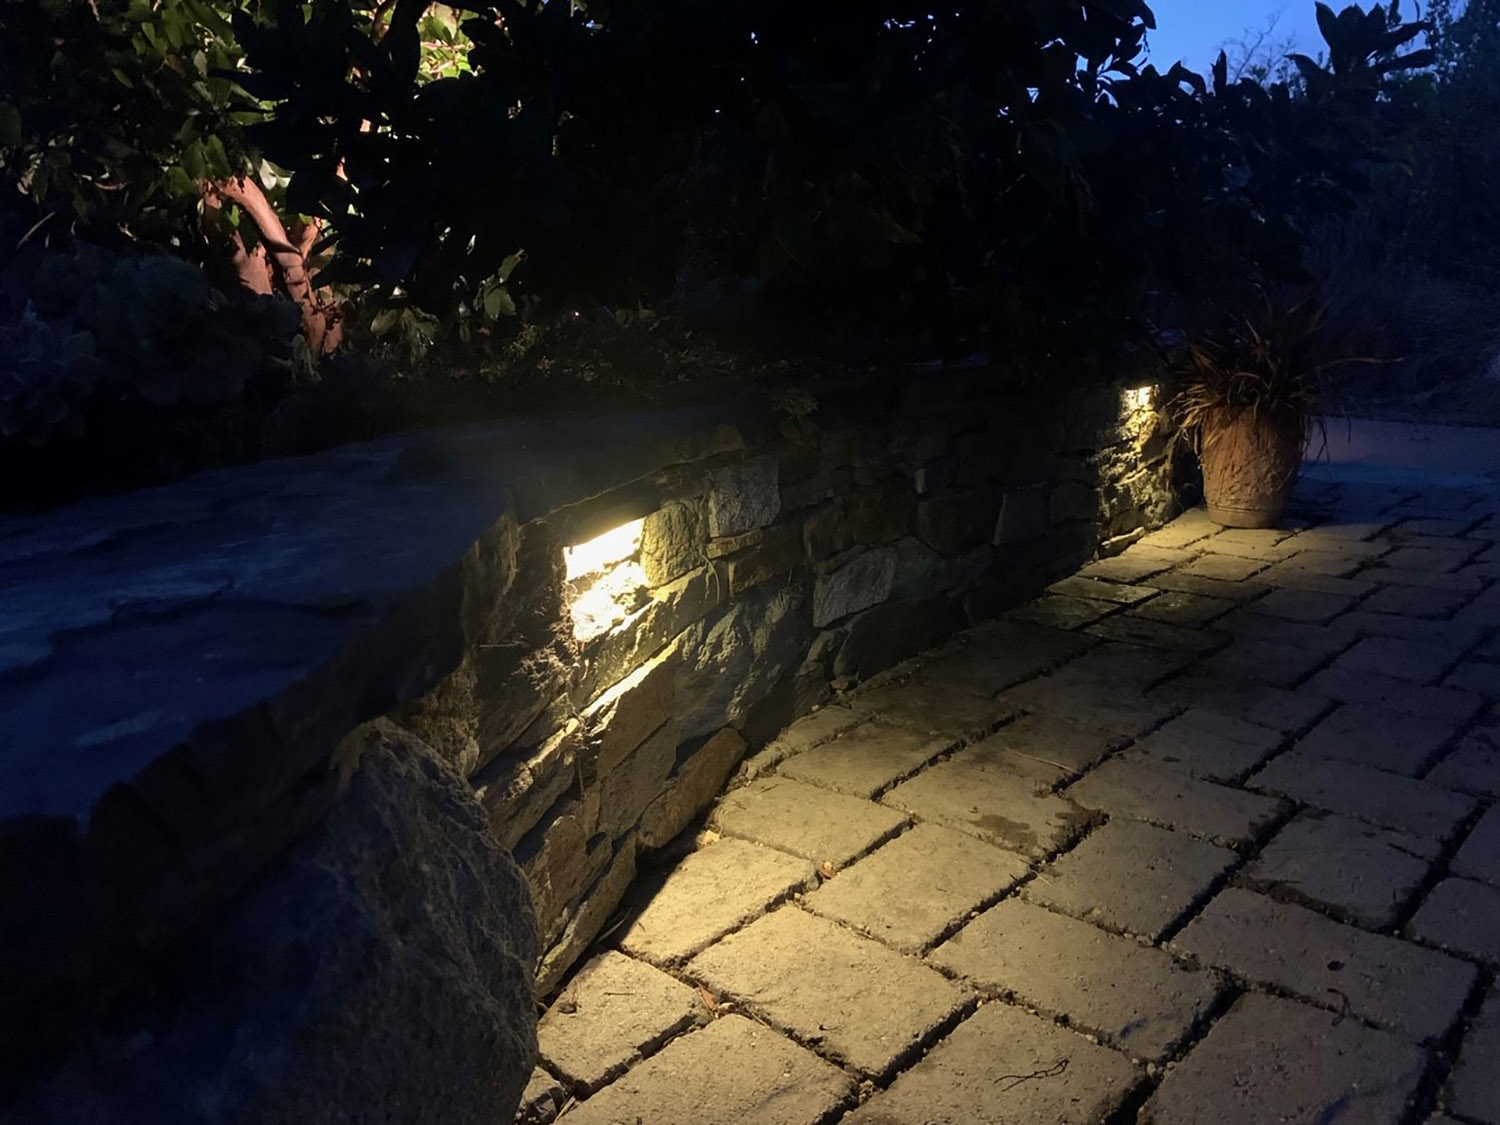
2. Define the Edges
Lighting the edges of your patio or the adjacent landscape can be for function or ambiance. Sometimes it is nice to look out the window and see orderly lighting on the edge of a patio. It will make you feel comfortable by extending your visible perimeter when you hear a spooky sound outside. In addition, you can light objects in the landscape adjacent to the patio, such as boulders, art, tree trunks, or plants. This periphery lighting makes the space feel safe and defined even if you aren’t lighting the patio itself.
Here are three suggestions for using lights to define edges:
- Place path lights or recessed lights on the edge of the paving.
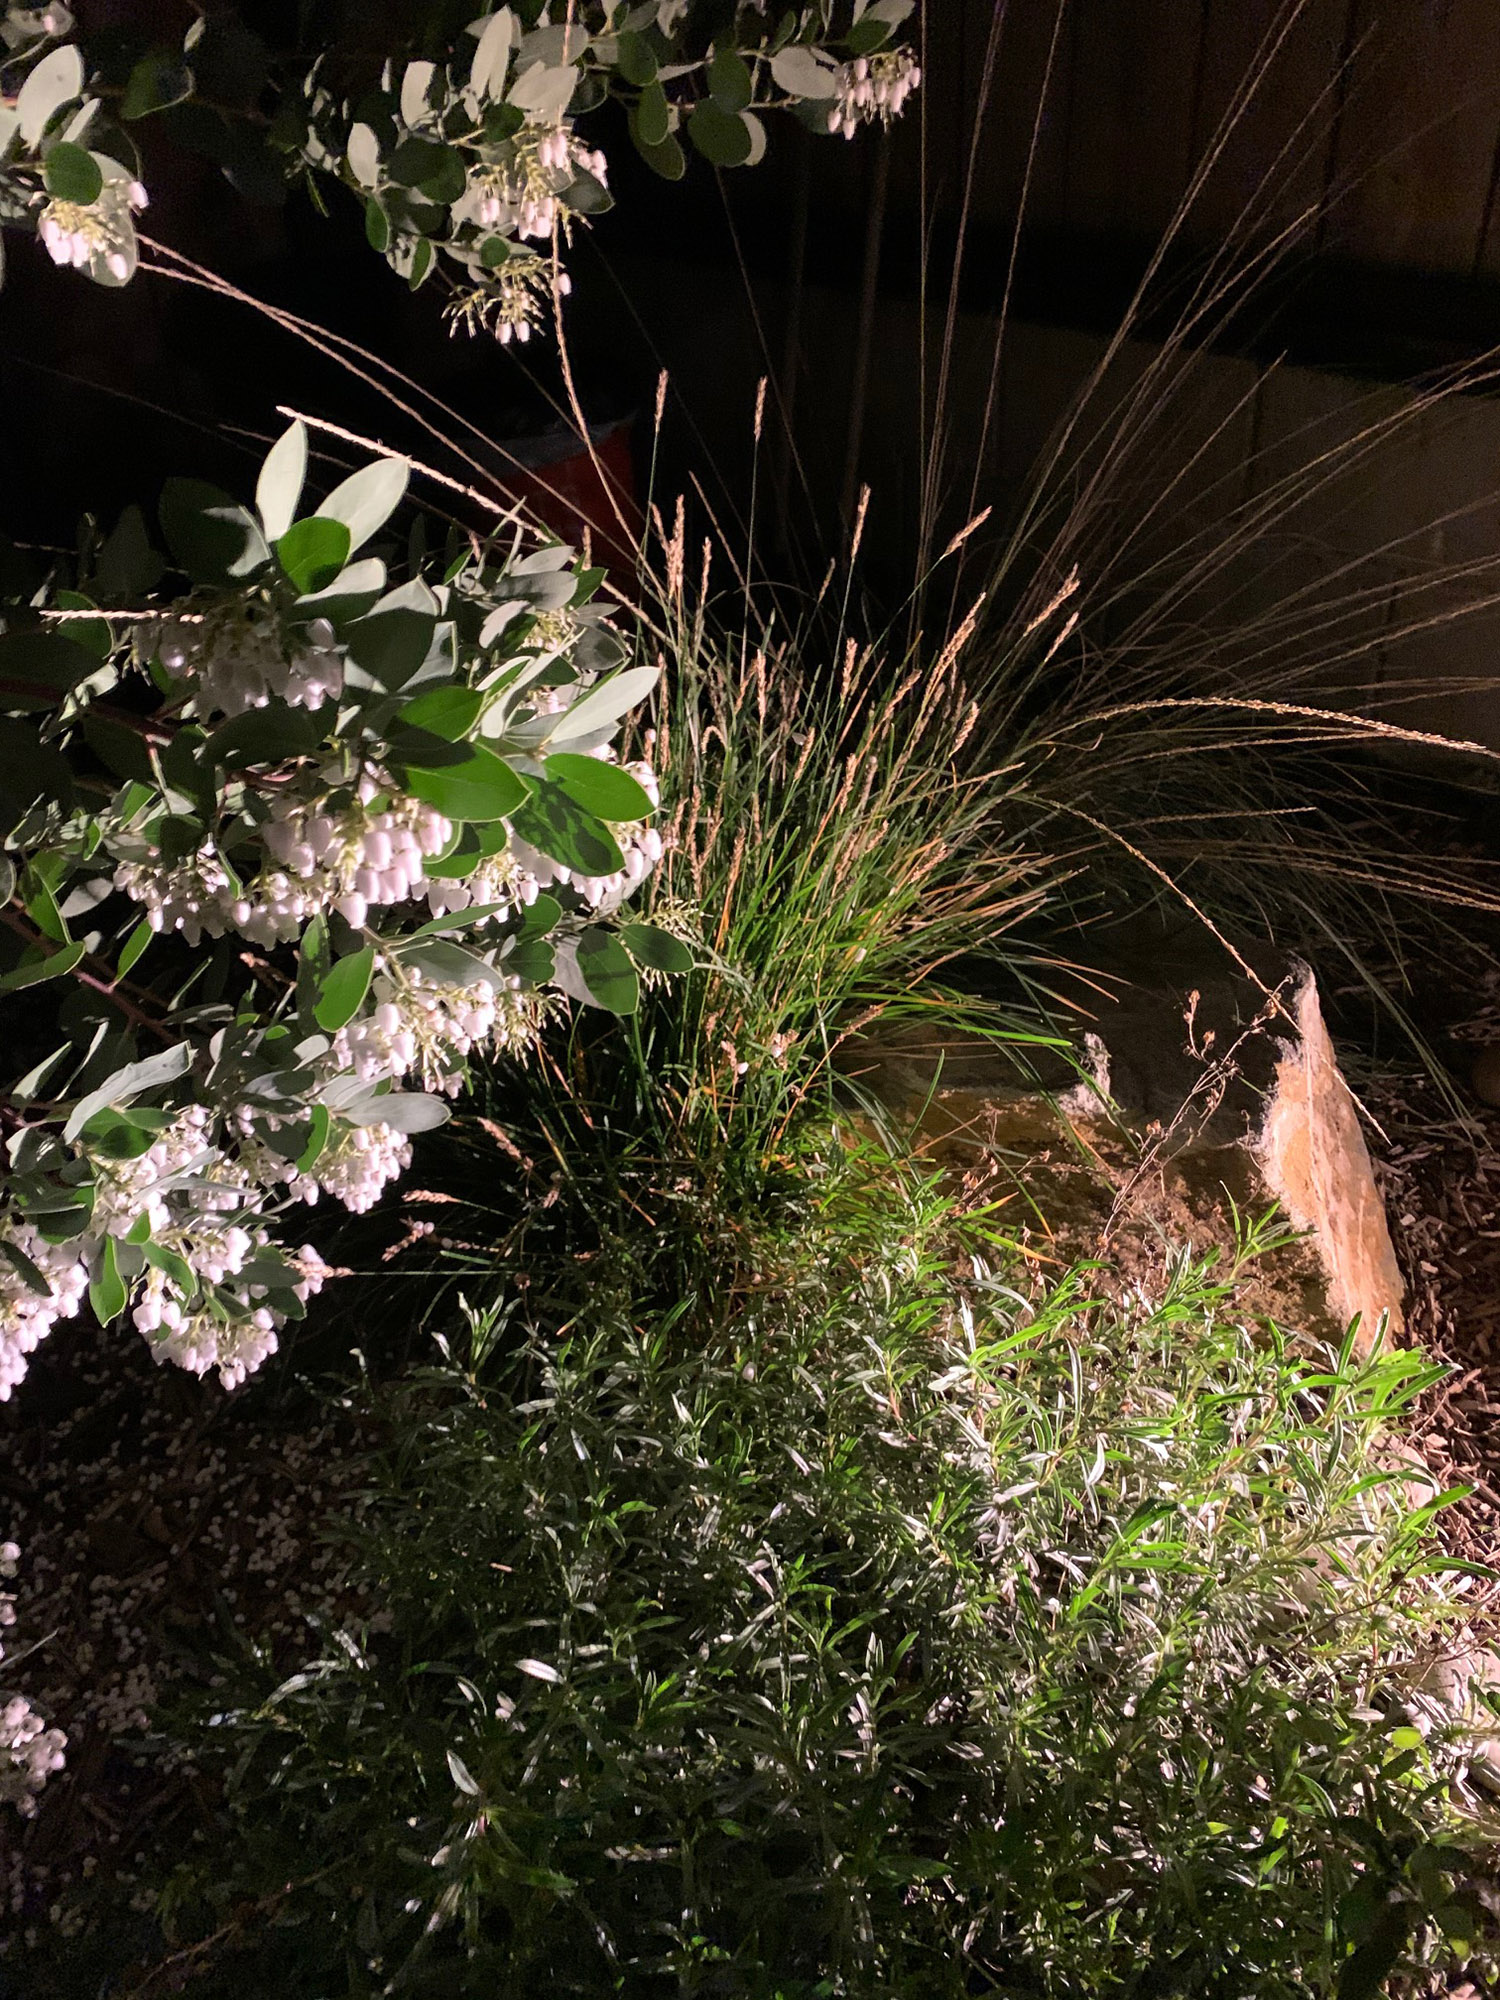
- Use broad-beamed wash lights to illuminate boulders and low plants for low detail textures and colors.
- Position narrow directional beam-up or spotlights to focus on art pieces, tree trunks, or specimen plants.
3. Create an Outdoor Room
It is remarkable how a patio can feel open and exposed in the day but warm and cozy at night with proper lighting. Walls and ceilings at proportionate heights create comfortable spaces. Ancient Greek architecture used the golden ratio of 1:1.61; create a restful and secure-feeling patio space with a width 1.61 times wider than the perceived ceiling height. As a rule of thumb, you can strategically light things to make the area feel a bit wider than it is tall. Use whatever is around – trees, bushes, walls, pergolas, fences – to emphasize this feel. Lighting a few select features will cause your mind to connect the dots and feel the geometry of a room you have created.
Trees are great for this use because you can uplight the trunk to create a wall and feather the light into the canopy to define the ceiling at the right height. Built structures like pergolas are beneficial because they can be customized and provide opportunities to uplight, downlight, or create wall or ceiling light patterns.
4. Create Ambiance
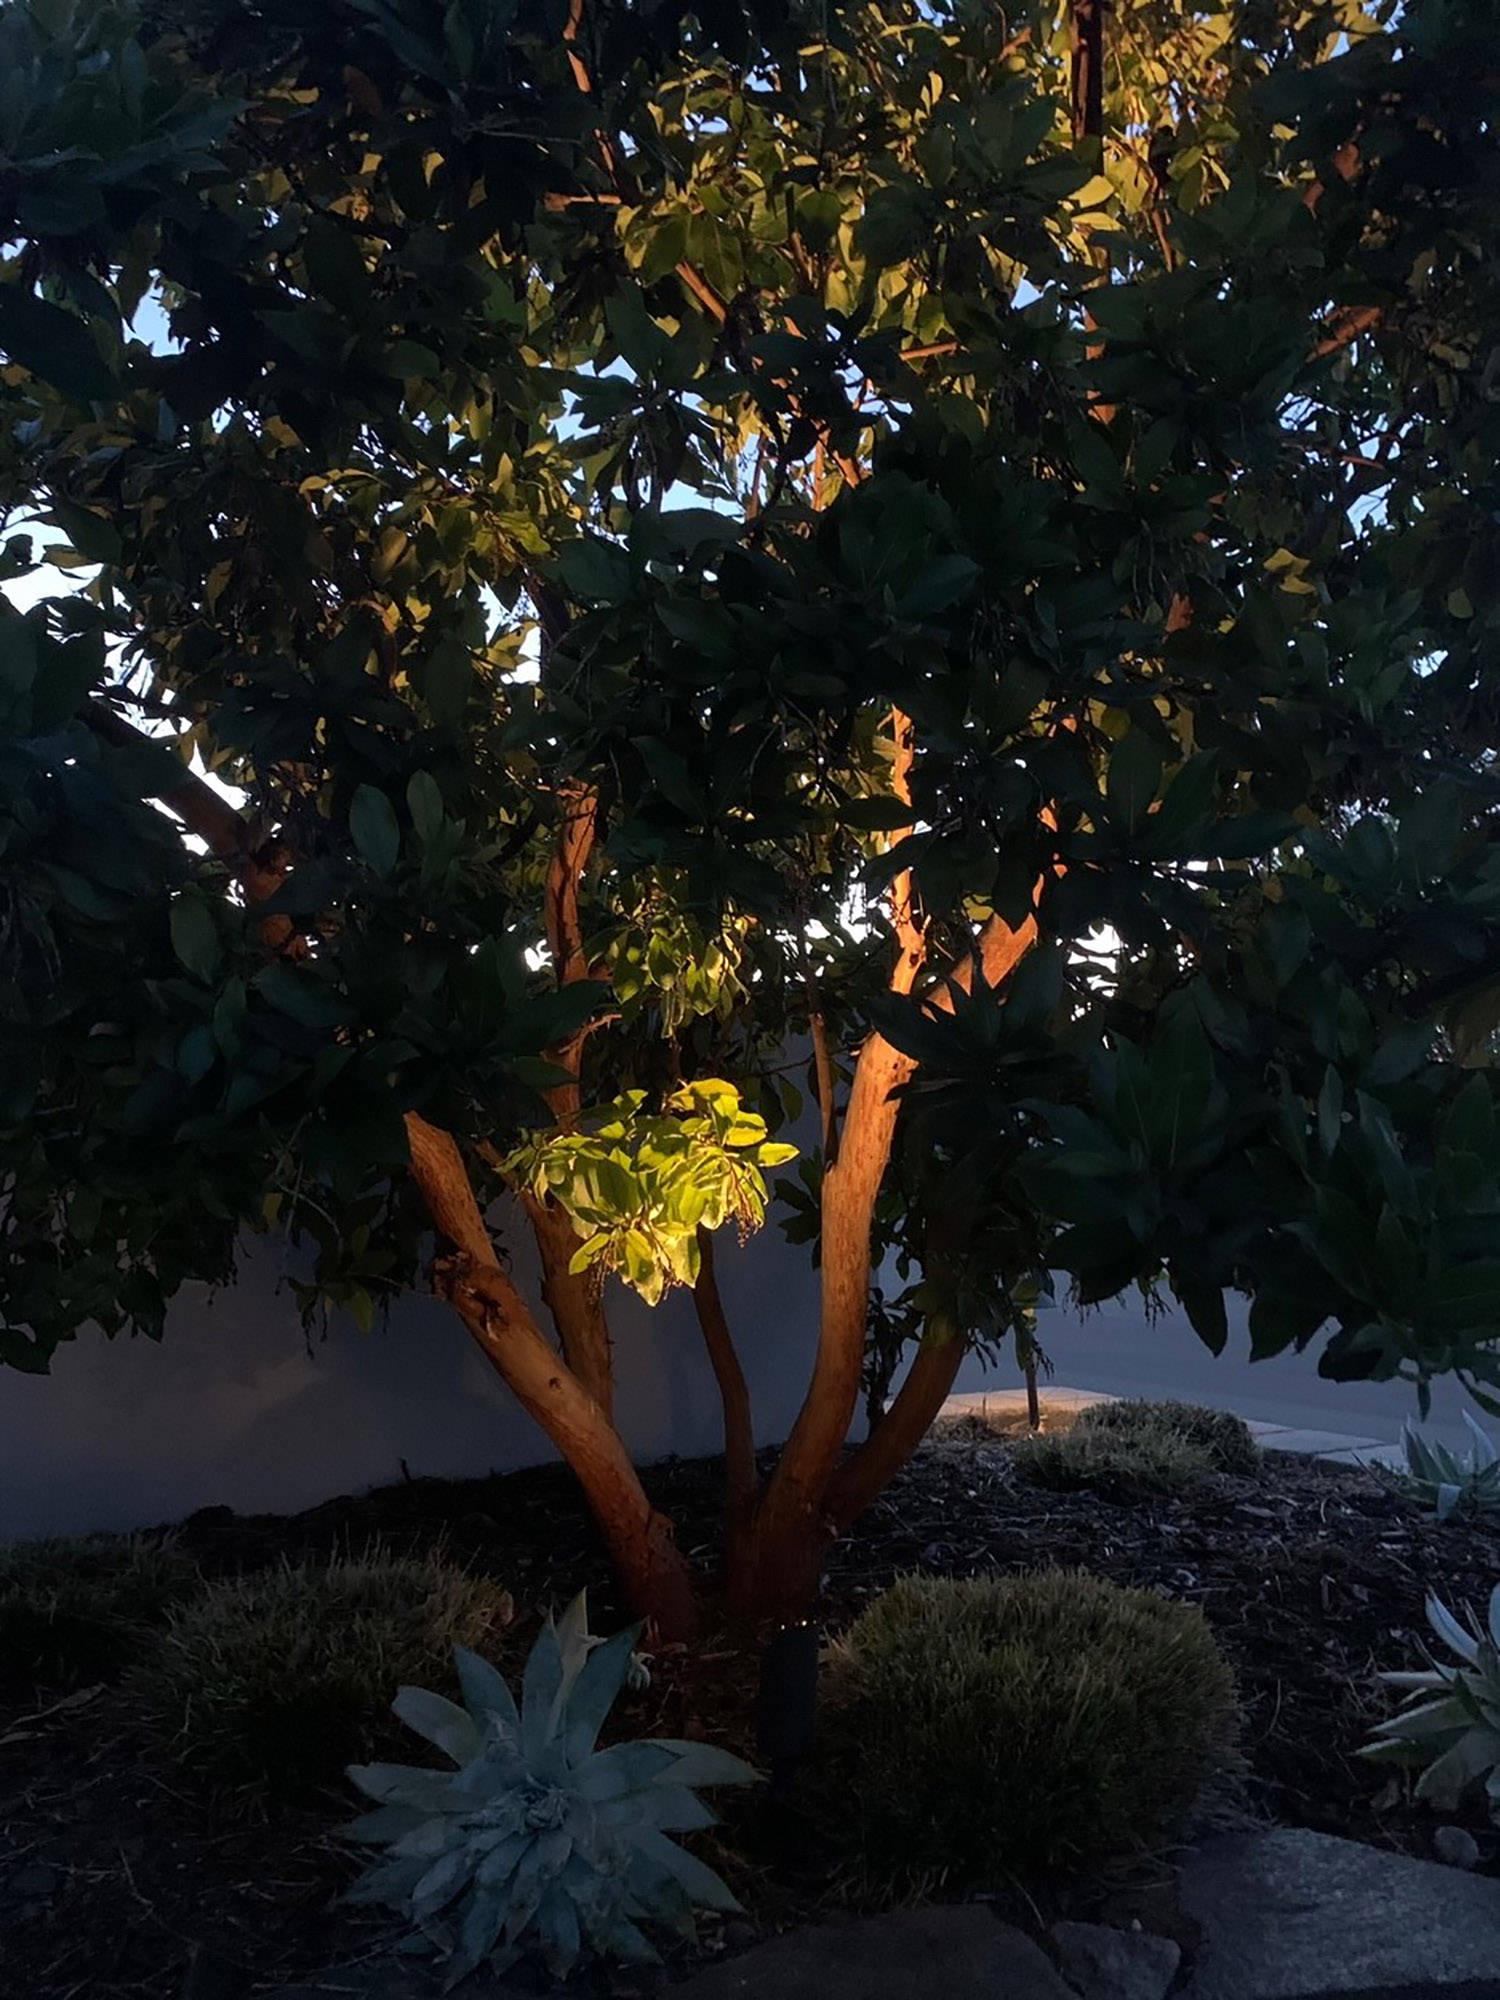
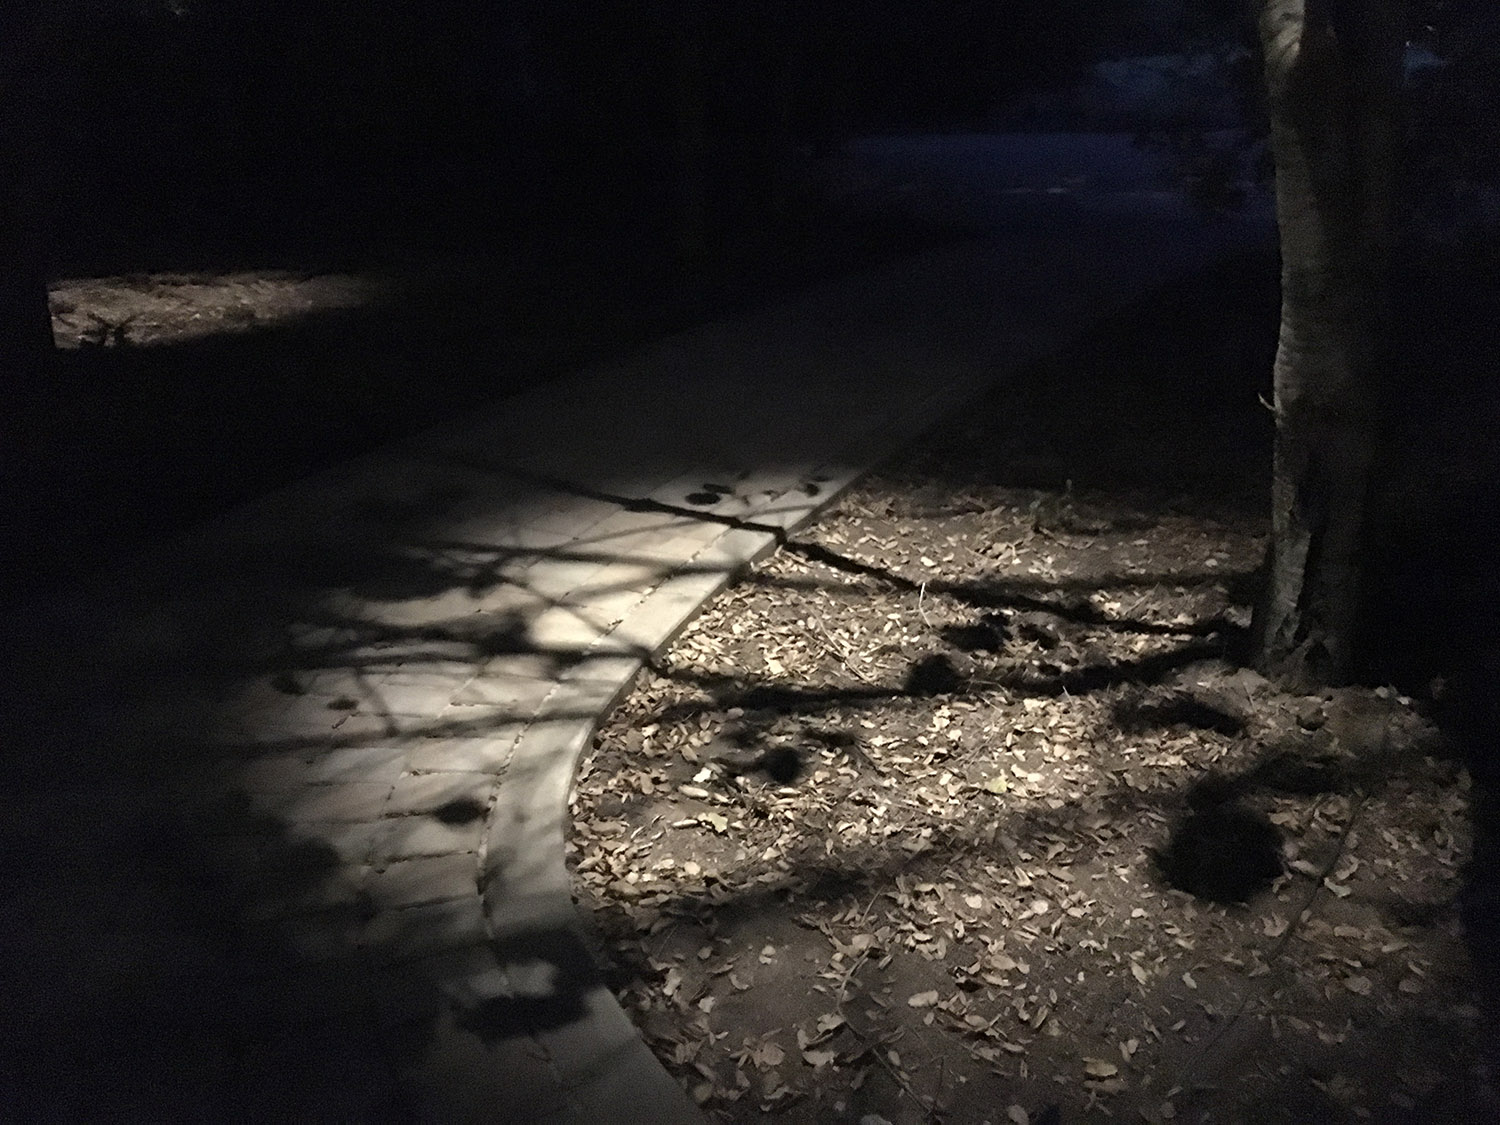
People often say they want low lighting to create an ambiance in their yard. This is not the light for eating your dinner, but it can be stunning in its simplicity. As mentioned before, lighting edges can really create a cozy feel. You can also extend your visible perimeter to more distant features such as trees, plants, art, or even barriers. Use wide angle wash lights to make secluded shrubs and boulders glow. Use directional narrow angle lights to illuminate focal points. For example, a red barked multi trunk tree can be up lit to create a mesmerizing floating warm glow in the distance. You can arrange a line of lights on an isolated or remote hedge or wall to define a wider perimeter of visual space to feel more secure in a brighter lit patio. Moonlights, or hanging pendant lights, can be set high in trees and create a whimsical moonlit forest feel. These are even more stunning if set over a branch to create a shadow pattern on the ground.
Keep in mind that the color of things you light will permeate into the ambient light in a space. You can focus on greens and cool tones to create a calm space. You can focus on reds and warm colors to create a warmer, cozier light. You can also choose warmer or cooler tone lamps/bulbs by using the kelvin rating (A low rating of 2700k is yellow and warm, and a high rating of 4100k is bright white).
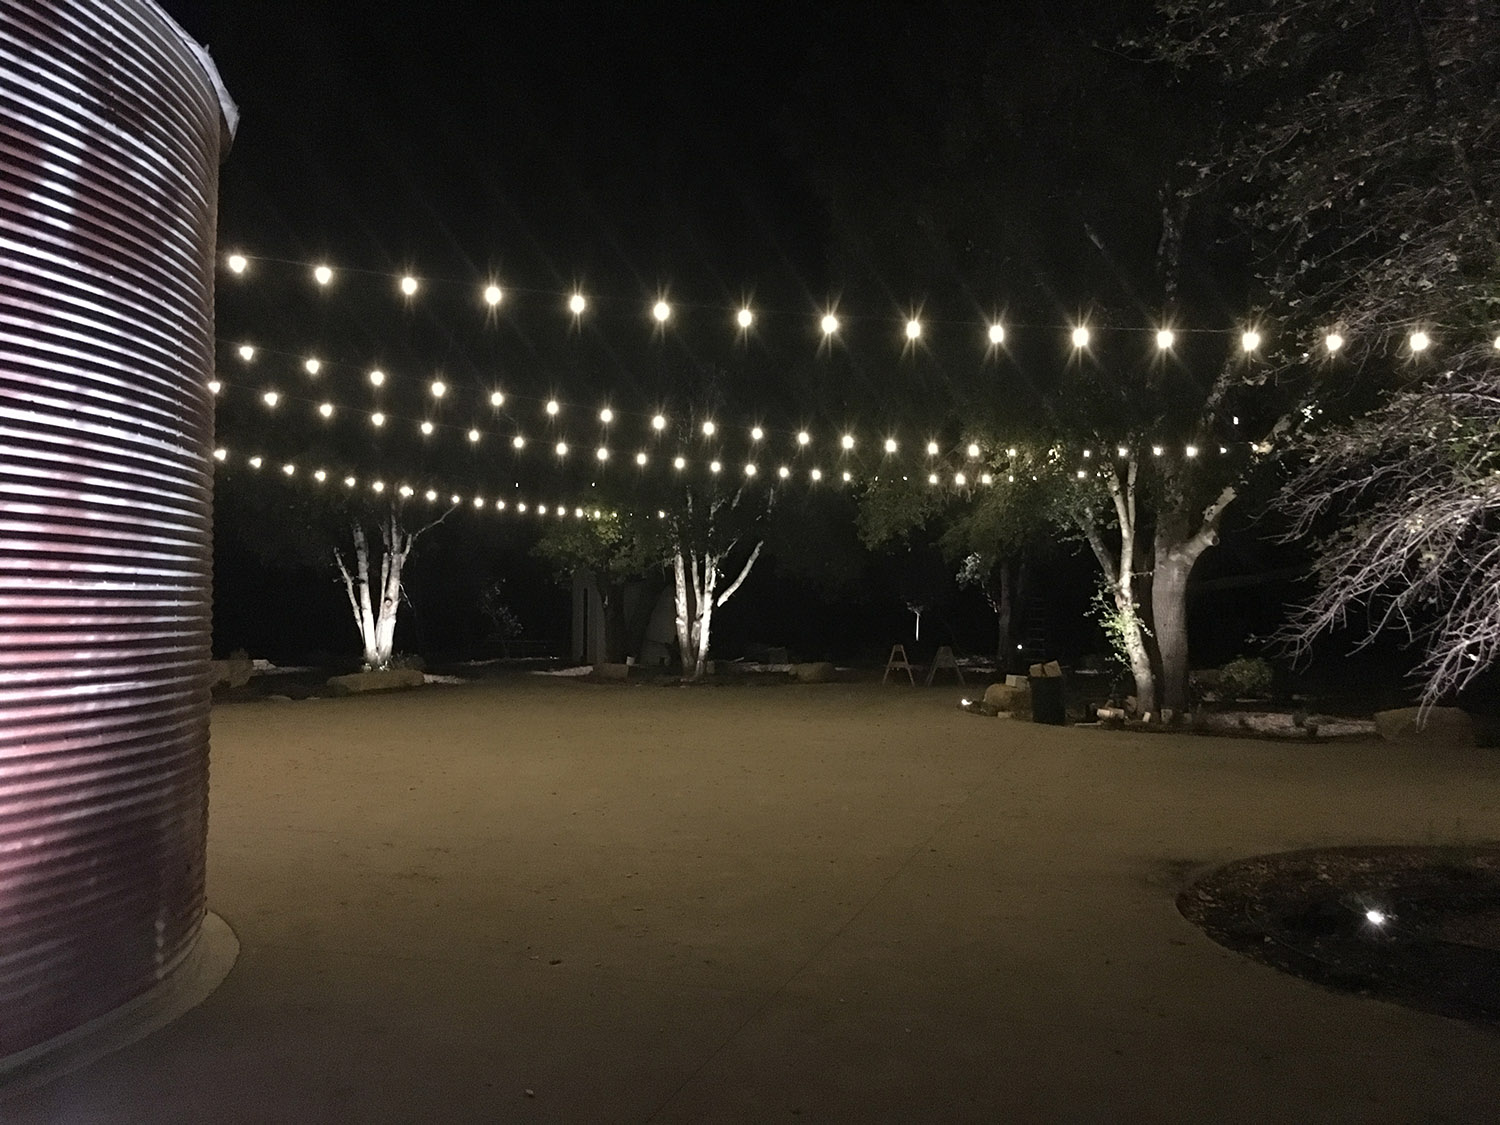
And don’t forget the ever-popular bistro lights. These typically low wattage bulbs dangle from strings stretched overhead to provide full area illumination. Bistro lights can be great for a party area because they light the entire zone with semi-dim light. Like a dim bar experience, you may not be able to see your food perfectly, but it is a very nice ambiance for a dance floor or casual hangout. When arranging string lights, consider the density of bulbs for even lighting. Also keep in mind that you would like these strings to look okay during the day, so create intentional patterns and avoid tangled webs. Use built structures, poles, or trees to secure them at a comfortable height.
5. Display Artistic Patterns
These days there are fixtures suitable for creating patterns on the ground, walls, and ceilings. When creating defined designs for a contemporary look, it is essential to map them out with a measuring tape. You are usually working with fans of light over a flat surface. In some cases, you are illuminating things that were already installed in an orderly fashion, like equally spaced trees or wooden posts.
You can use recessed lights in patio flatwork to shoot low fans of light from a central can fixture. Often these have 2, 3, or 4 radiating fans of light that can create a geometric pattern on a ground plane. You can use sconce lights on walls or wall columns to create equally spaced downward or upward fans of light. Some sconces have both up and down light to create an hourglass light pattern. When lighting existing trees or built structures that are already equally spaced, use directional spotlights to create a uniform rhythm. For example, fences usually have equal spaced posts and panels which can be lit by narrow or wide angle up lights, respectively.
Mix it Up
As you can see, these five techniques are not mutually exclusive. Choose what works best for you and your space, and light it up! By using one, two, or several, you can make your outdoor areas come alive at night.
Ready for a landscape lighting design and want to talk to a professional? Contact our landscape designers at [email protected] or (805) 466-6263.
Sep 1, 2022
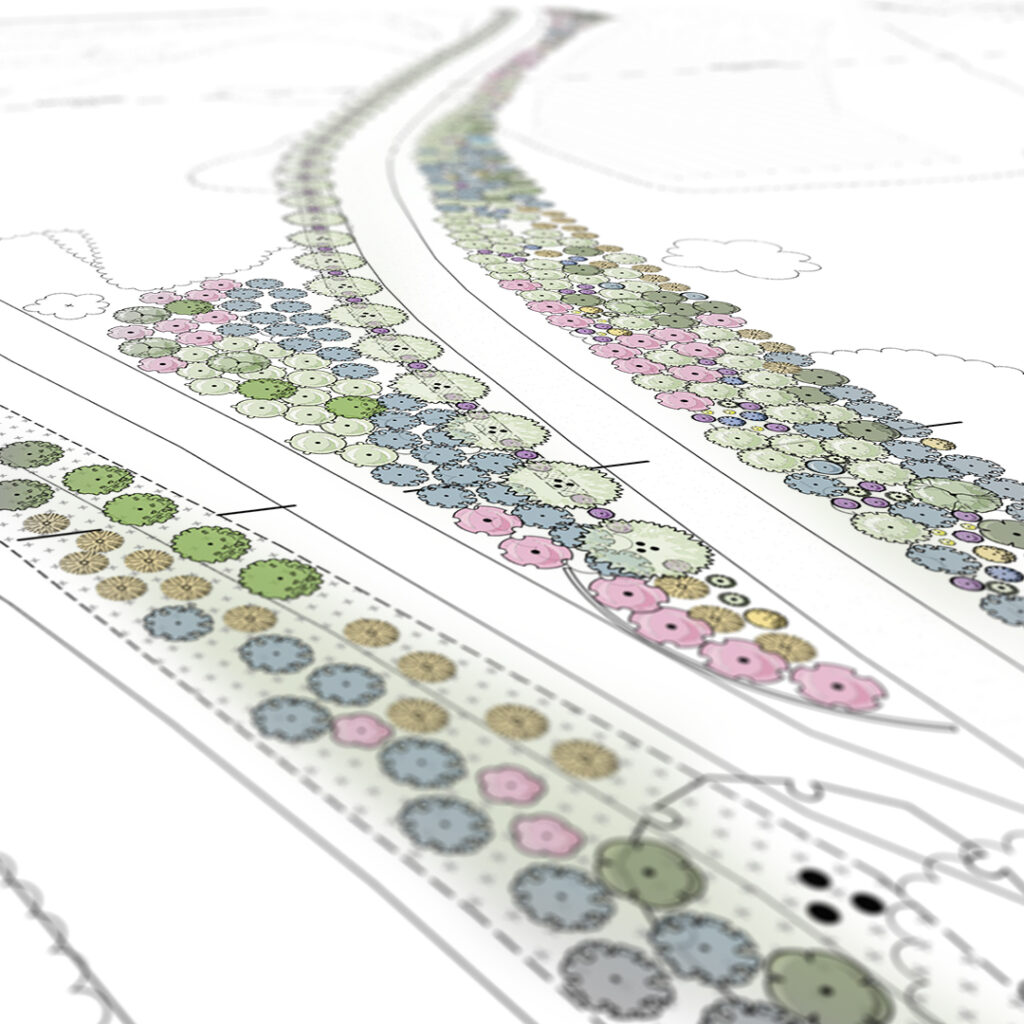
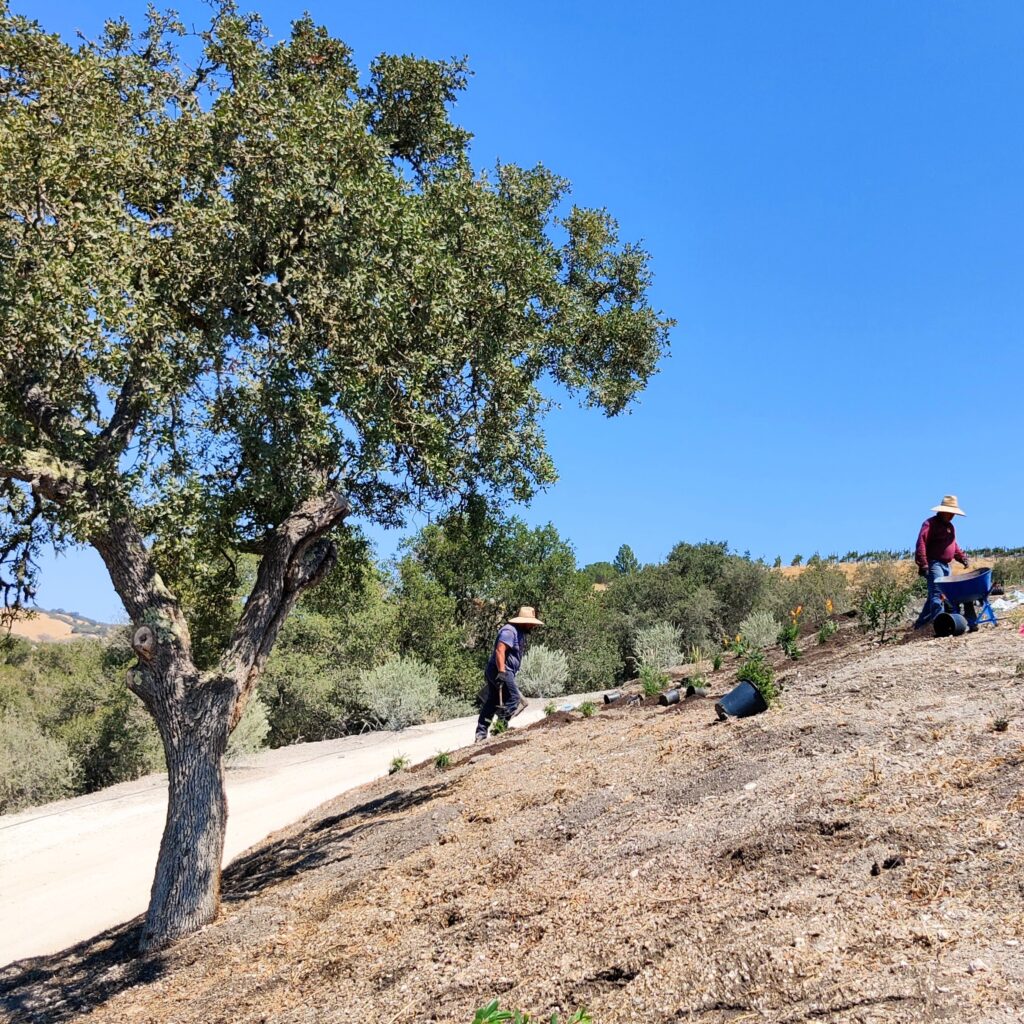
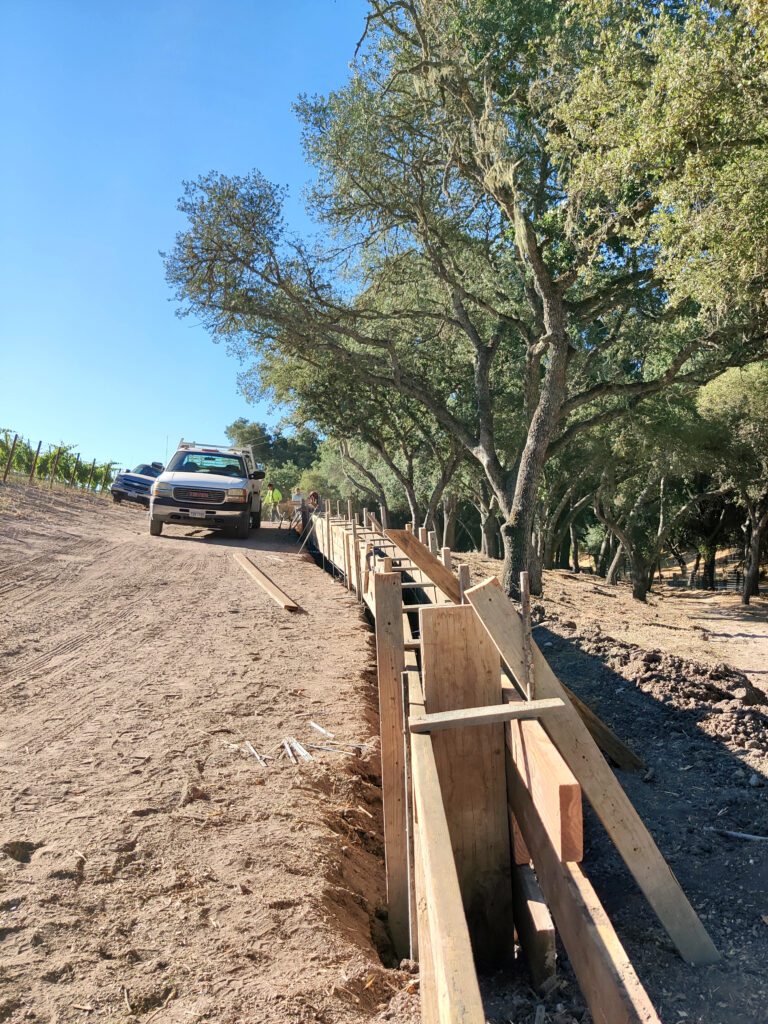
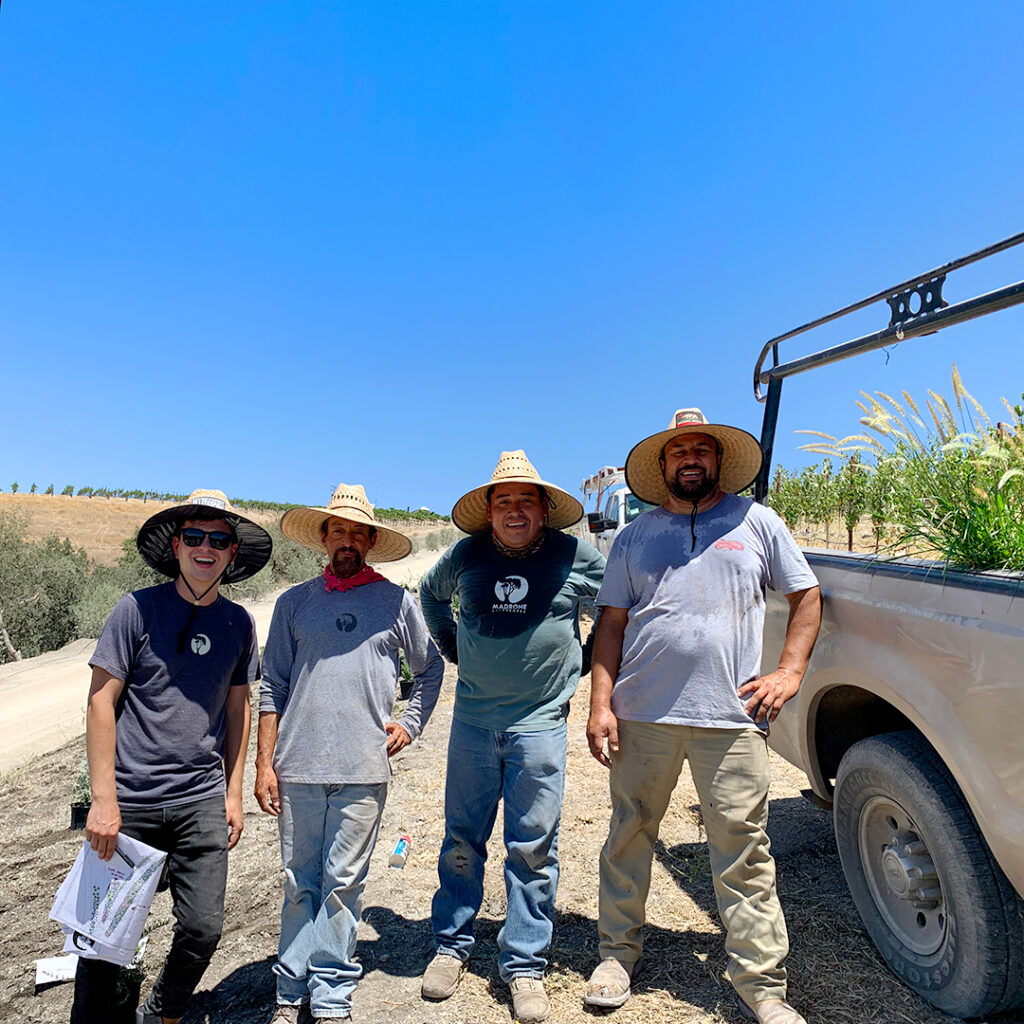
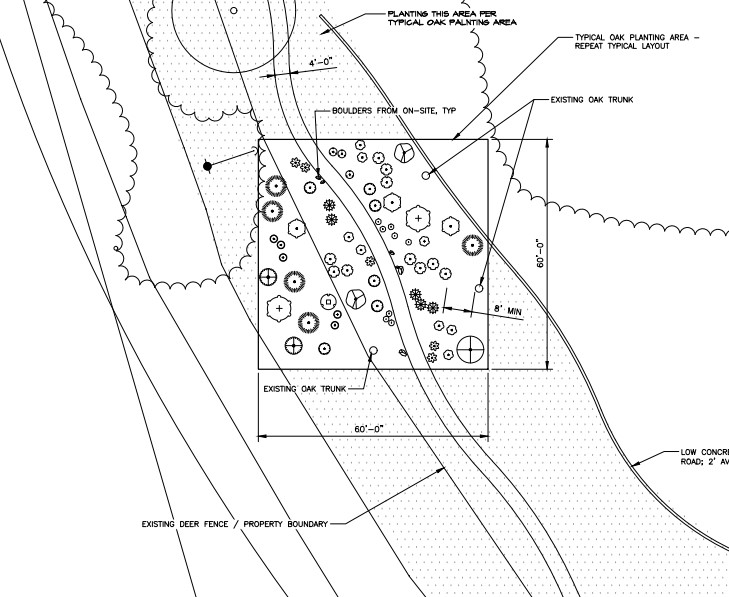
The Maison Mason Vineyard in West Paso Robles is a native oak grove paradise backdropped by classic sweeping grapevine rows. Madrone was tasked with designing a formal entry and establishing the native oak understory. We achieved the former through a dense planting around a new automatic entry gate, low board-form concrete walls, and select ornamental planting along the main road and entry drive. The latter goal was executed by locating a palette of native species on-site throughout the understory area, balancing long-lived foundation plants in a harsh climate with seasonal interest and lush variety in key areas.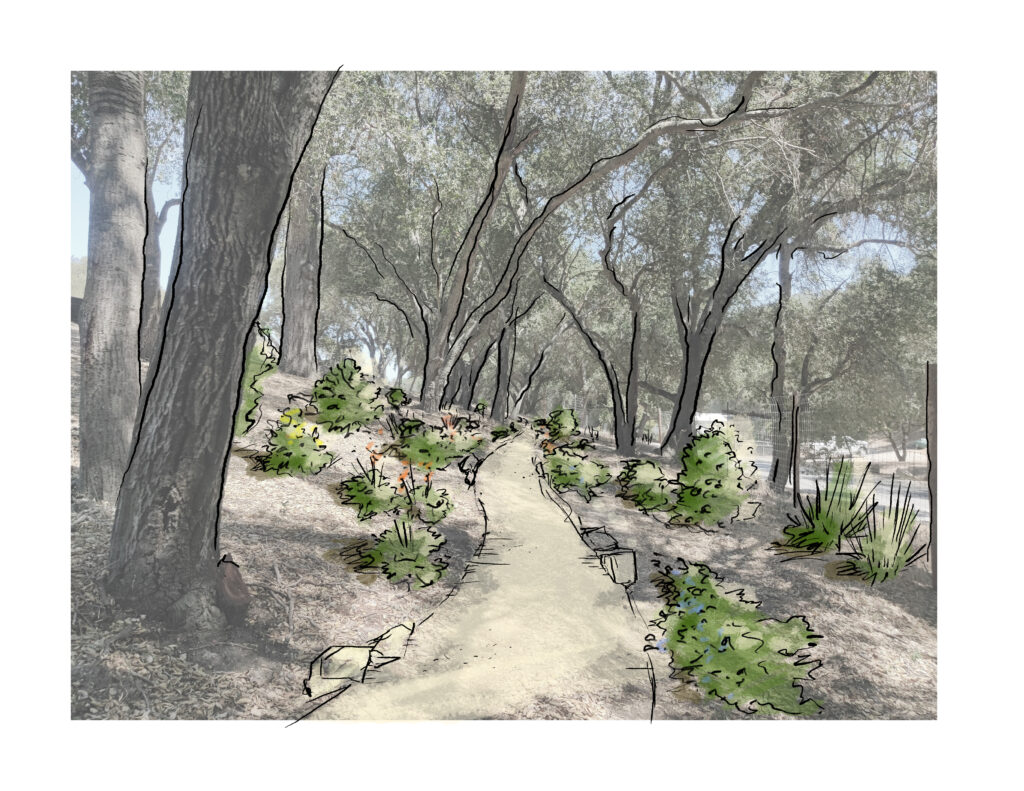
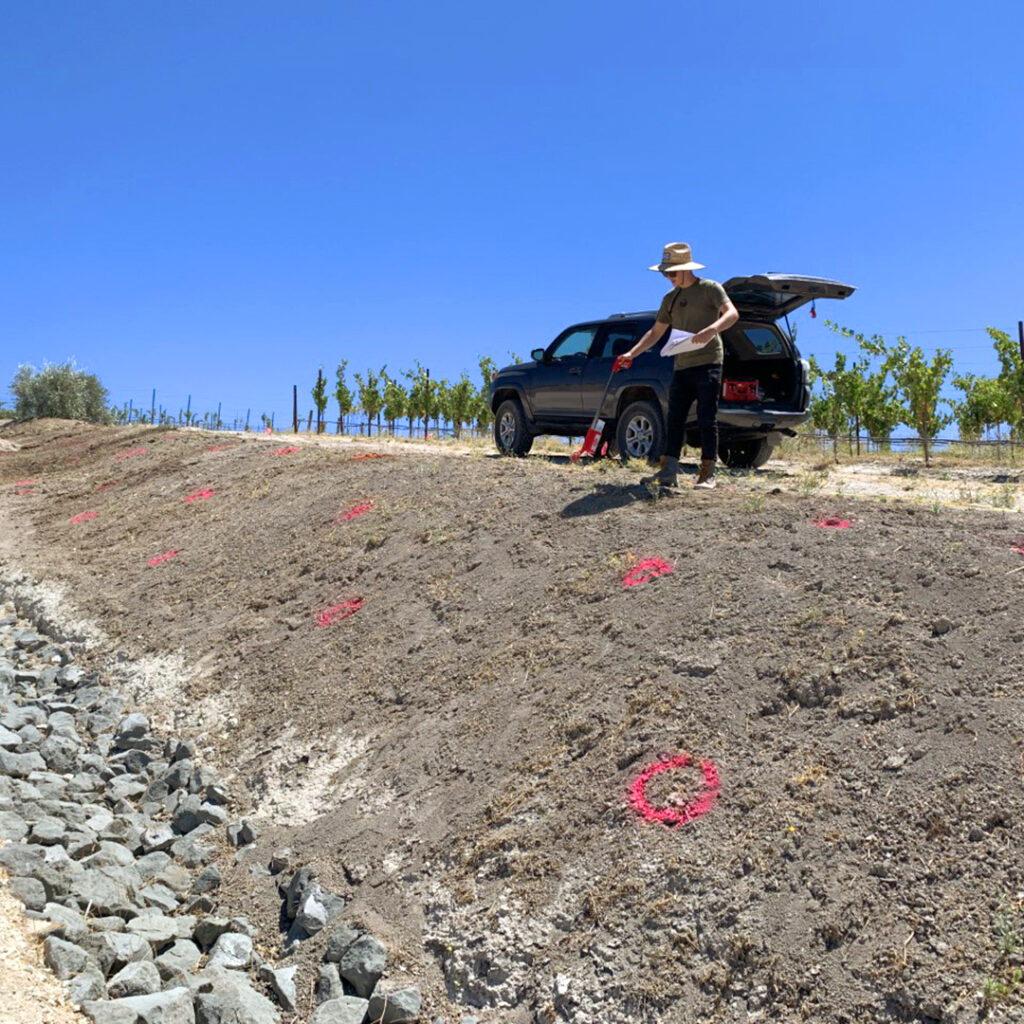
Due to a steep cut slope bordering the entry drive, strategic planting selections targeted aesthetic and erosion concerns with native plant species that would spread and drape across the area. Brightly colored flower species stipple the palette and create the perfect drive up to sweeping vistas and a future development location.
We designed irrigation and low voltage lighting systems throughout the new landscapes to achieve longevity for this beautiful grove and entry, inviting guests to come and enjoy all that the vineyard offers.
Want more information on our vineyard design services? Contact our landscape designers at [email protected] or (805) 466-6263.
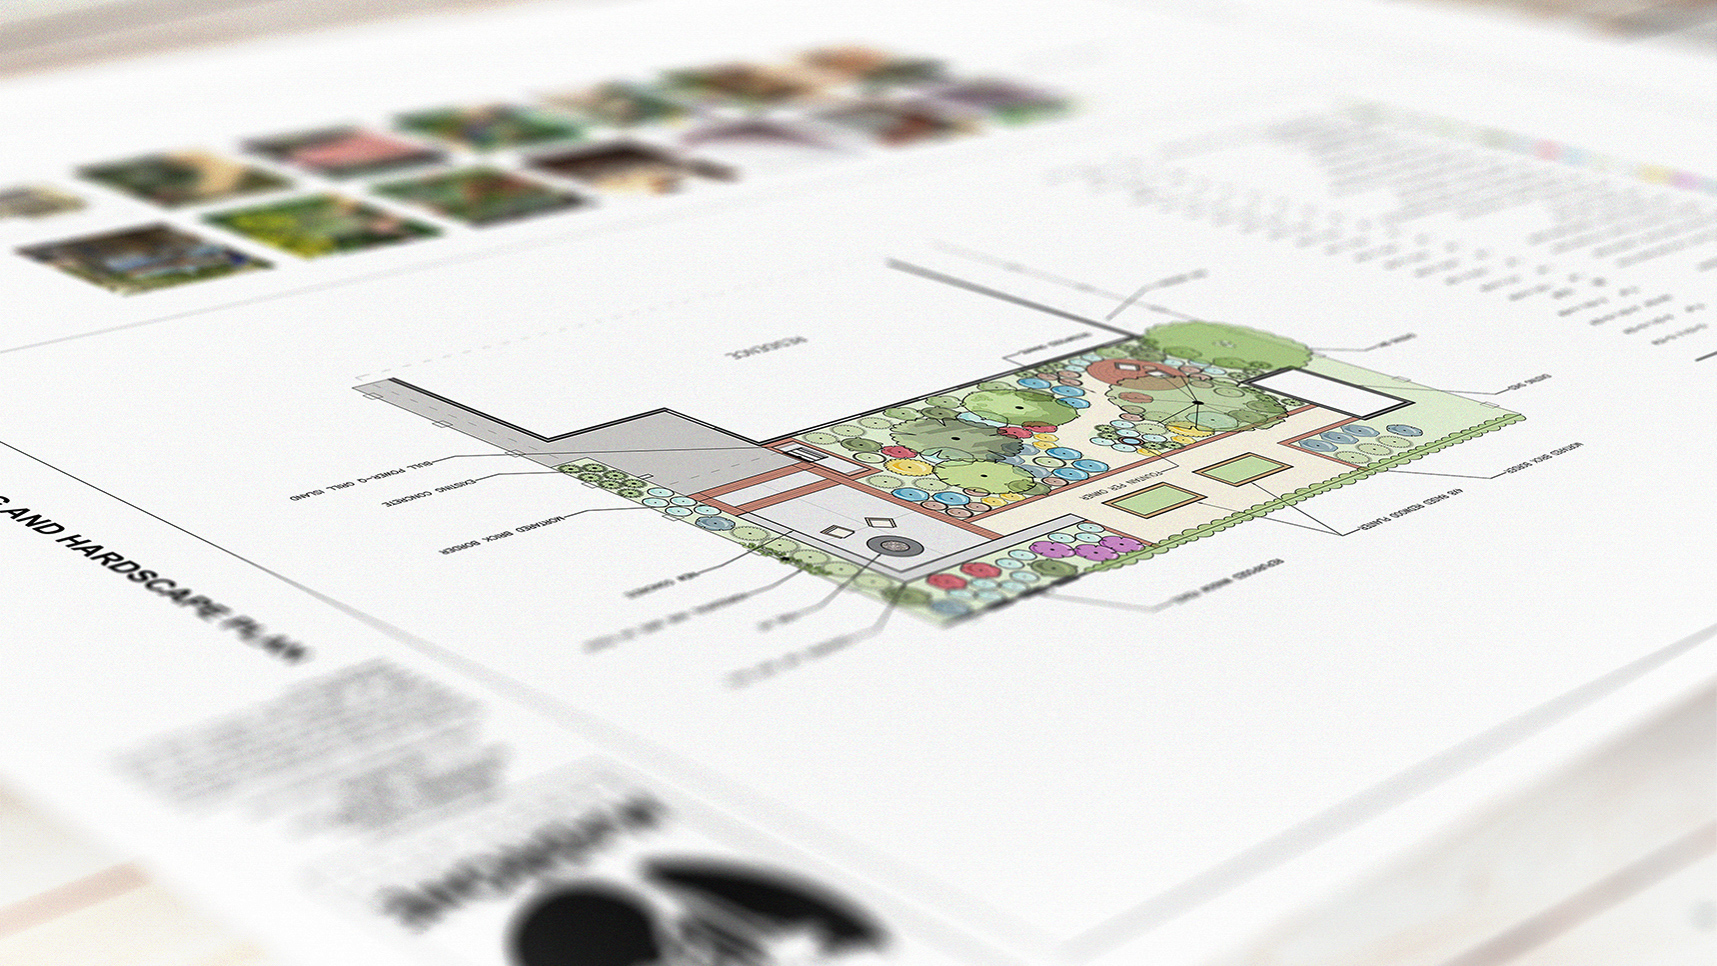
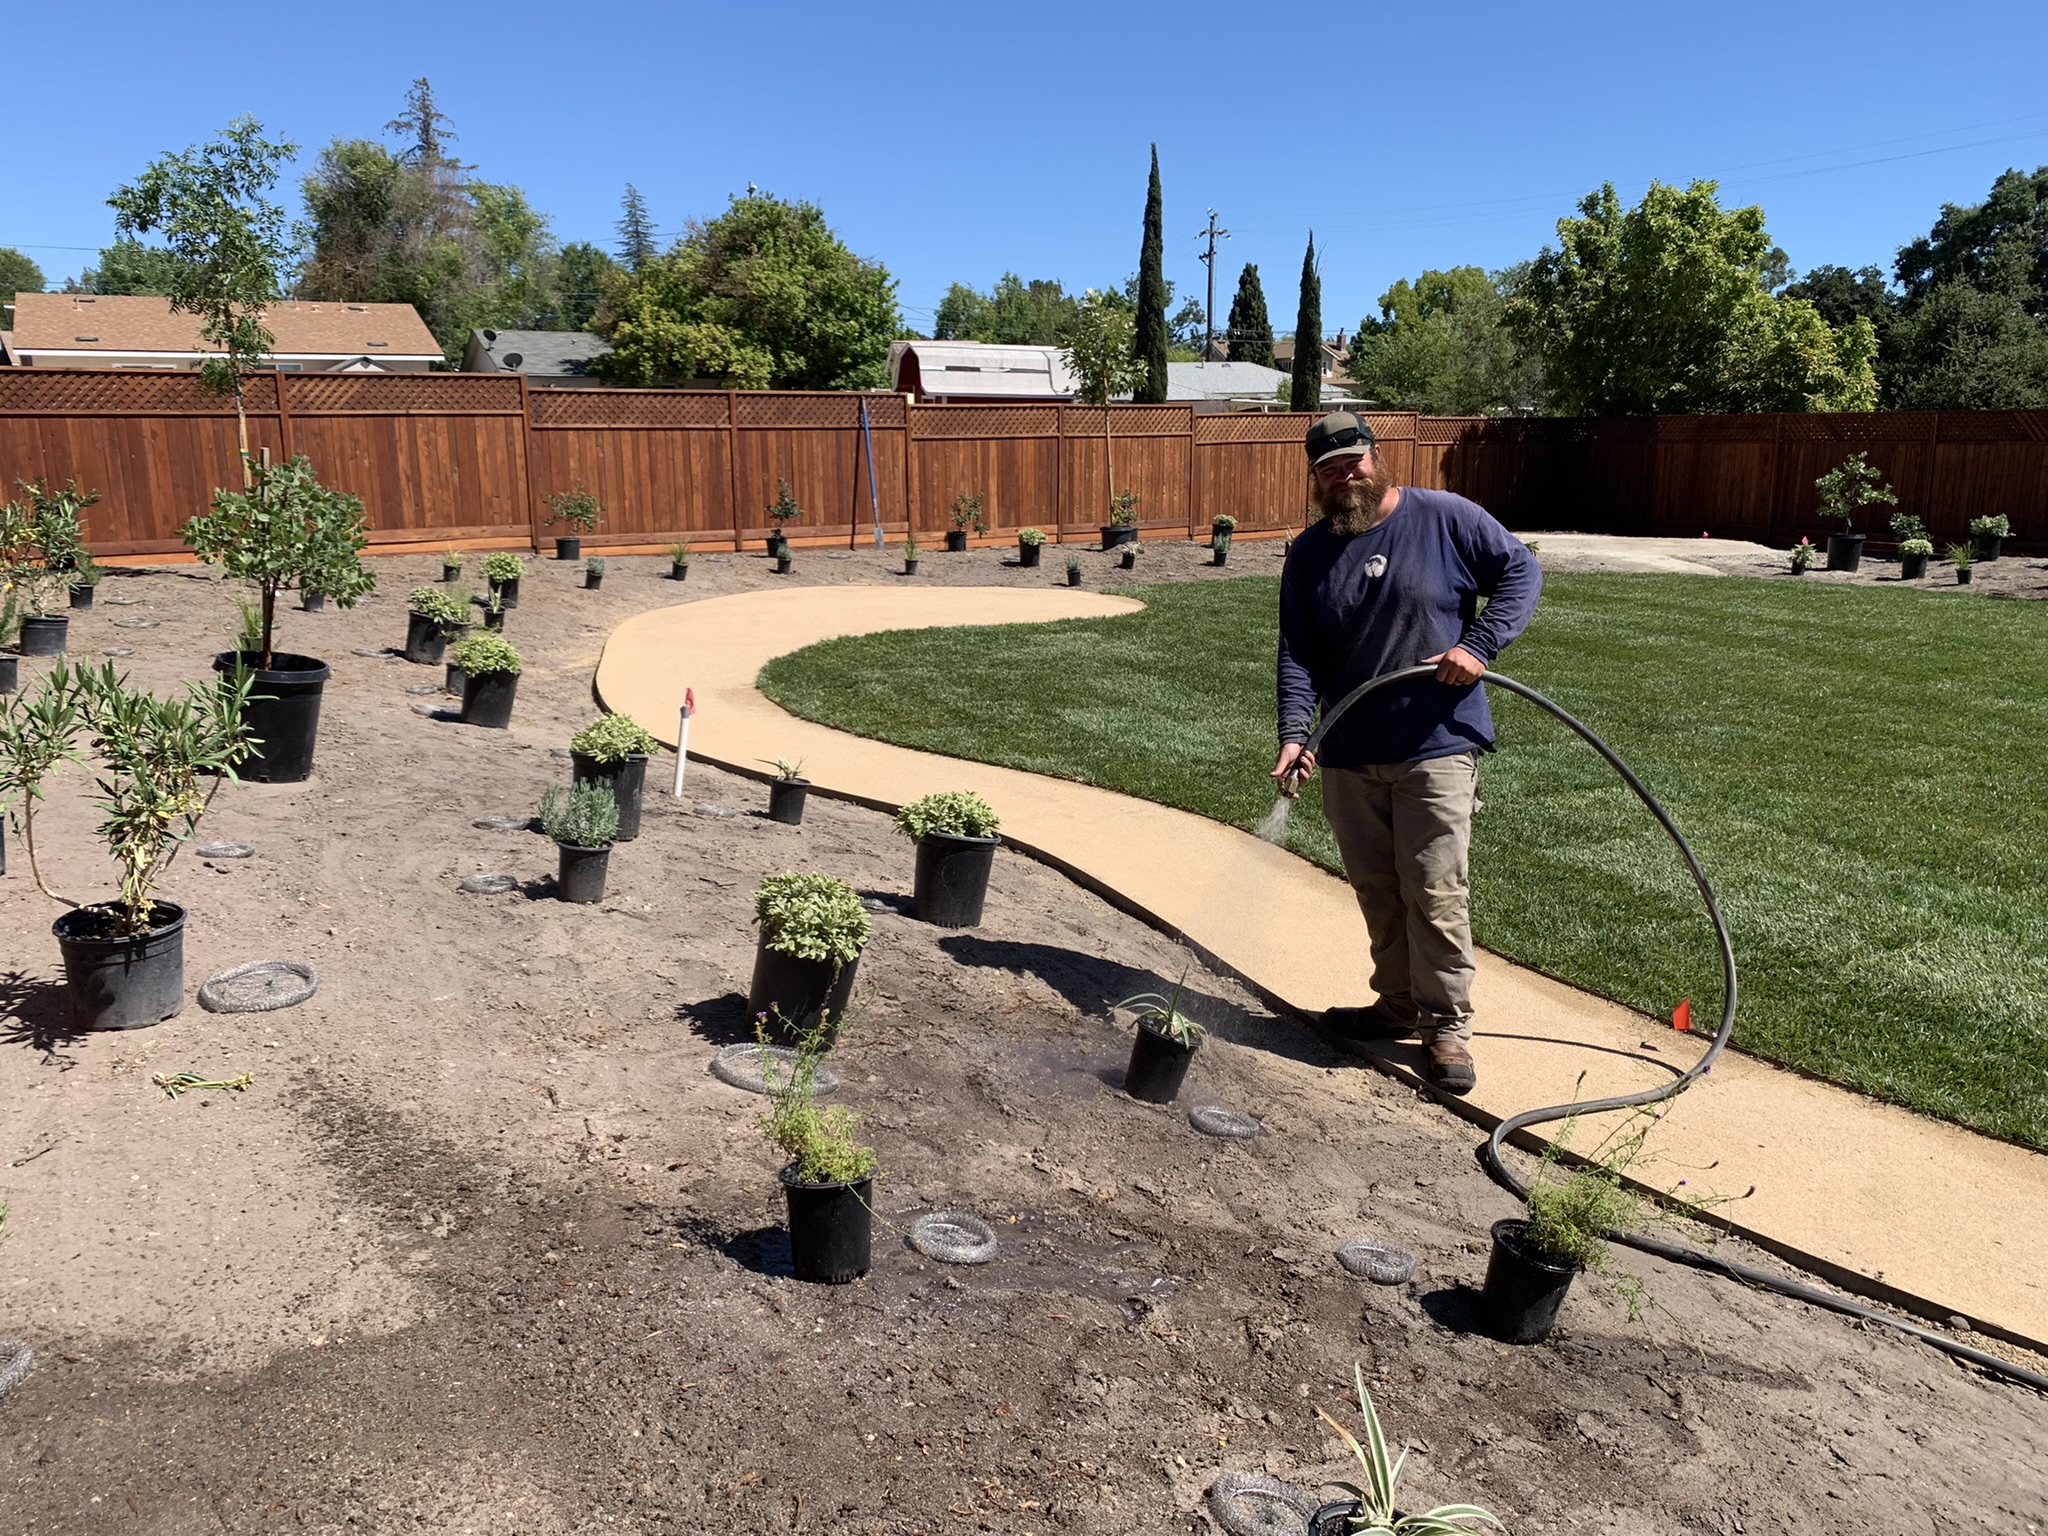
Jul 29, 2022
Top tips for a better investment and landscape, from design through construction
What is Design-Build Landscaping?
Design-Build landscaping is exactly how it sounds: one team provides both the design and installation of the landscape, rather than splitting those services between companies. Design-build landscaping is quite common and provides multiple benefits. Unfortunately, a homeowner or building owner will often hire a landscape contractor to install plants and irrigation without design. This is not the ideal scenario. As with any type of building, it is always best to begin with a design.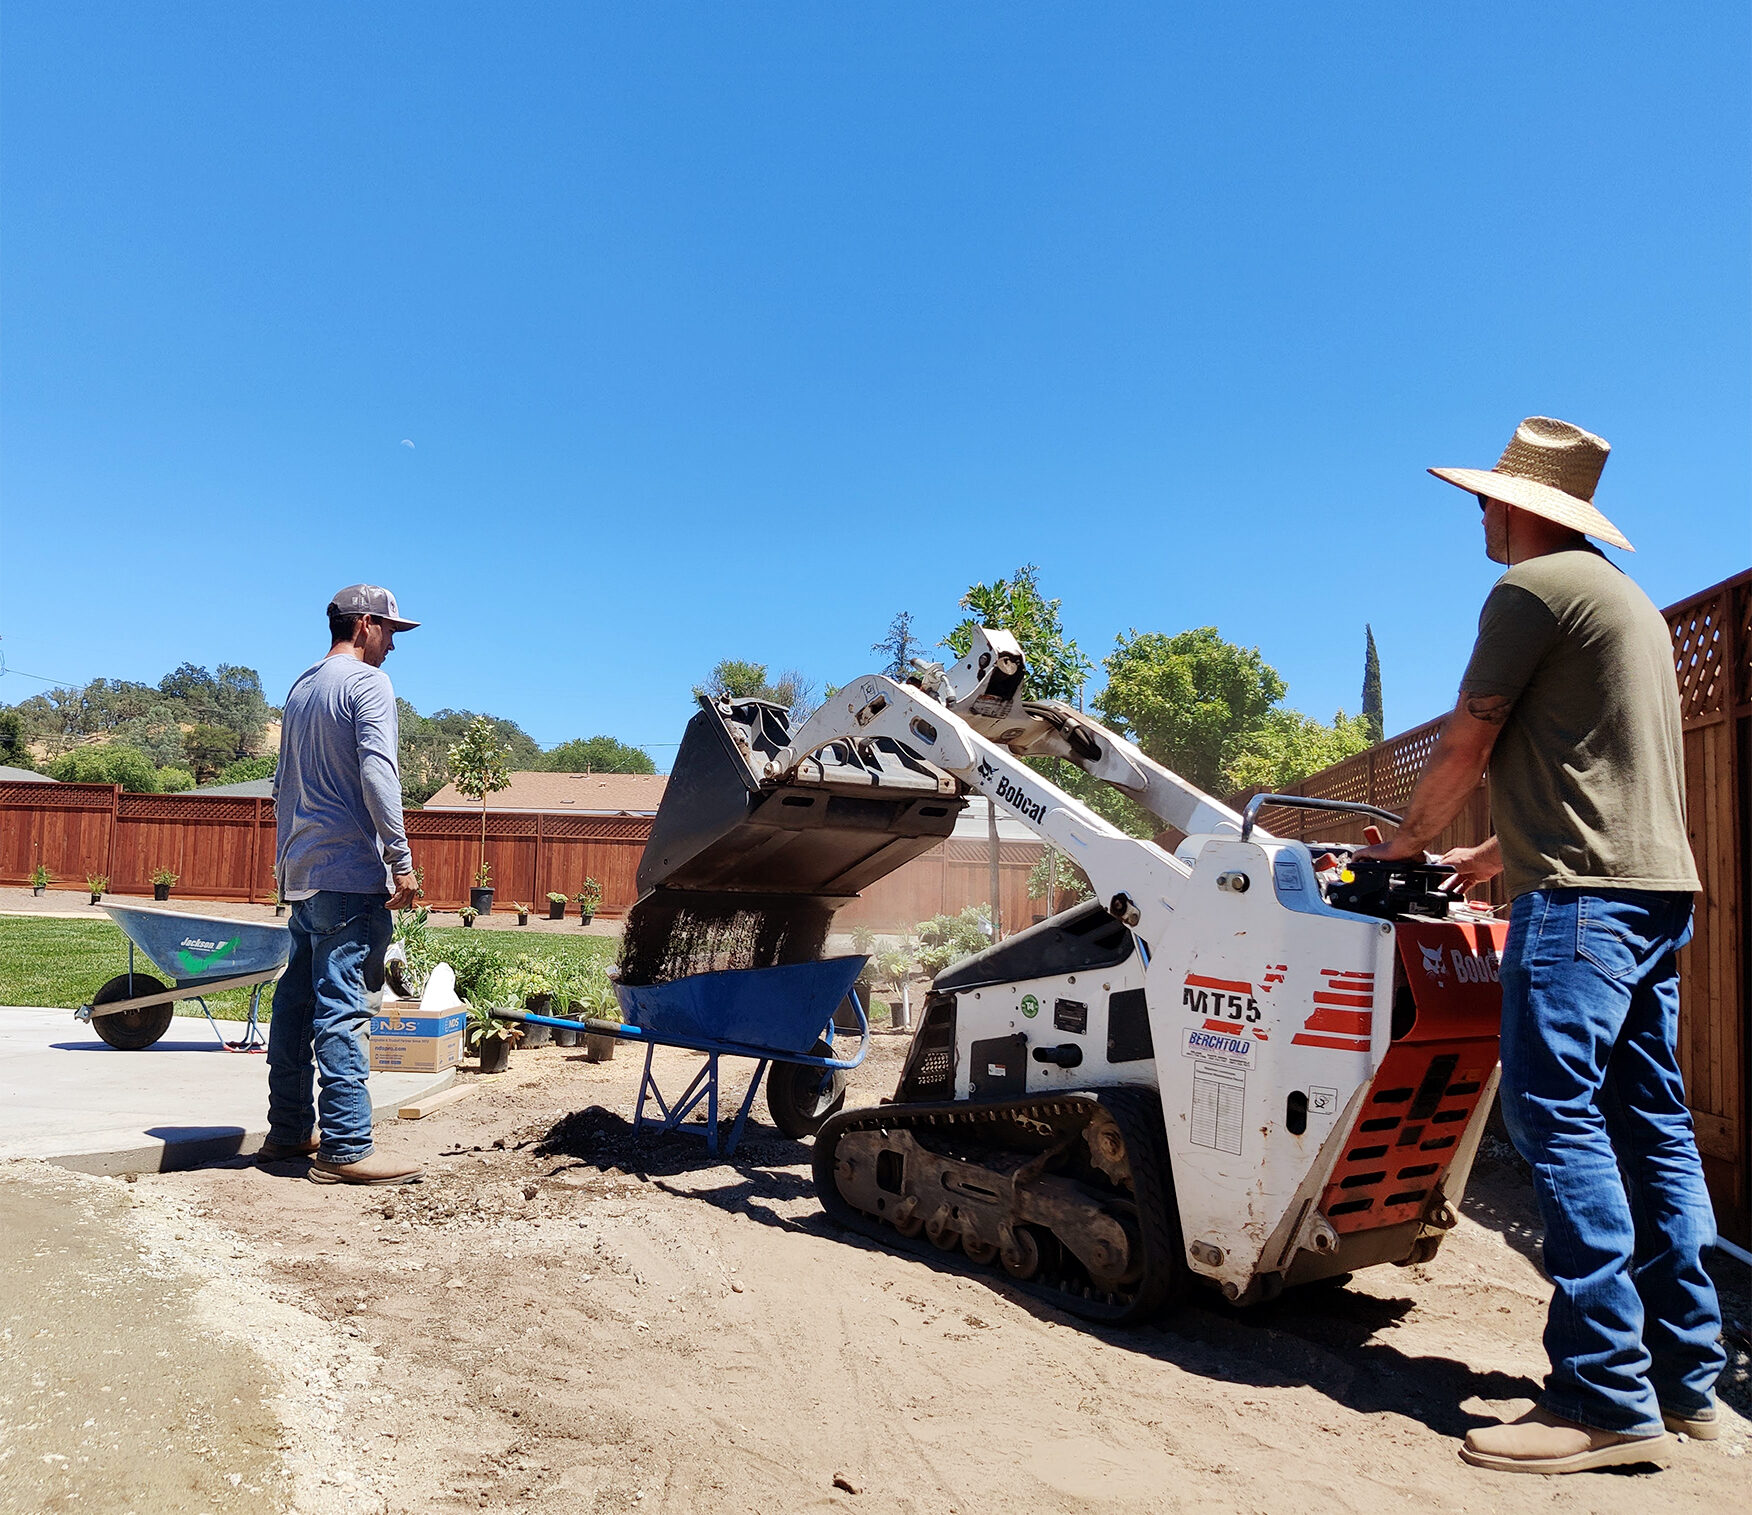
Why Design-Build?
When the same company performs both design and installation, their professionals work together often and can provide a more seamless delivery. The teamwork involved in the design-build process for landscape construction can add a lot of value to your finished landscape. Often an integration of architects, designers, engineers, and builders, the design-build process takes advantage of professional, licensed experts working together from concept to finished construction. The goal of this integrated process is to fulfill your priorities of landscape design and budget. At Madrone Landscape we believe strongly in the design-build process because the benefits are twofold: it allows us to do incredible work with and build great relationships with both our peers and our clients.
Design-Bid-Build vs. Design-Build: What are the Differences?
Design-Bid-Build: The design-bid-build process is common in the construction industry for clients who want separate design and construction firms. A landscape designer will provide plans for you, and then you will ask contractors to bid the plans. The design can go quickly if there are no cost limitations discussed. Once the contractors provide their costs to install the project, you may be shocked to see how much it will cost to build. This is when you or the contractor decides how to change the design to fit within the construction budget (this process is called value engineering, where items are removed from a plan or less expensive options are chosen to reduce overall cost). You may also go back to the landscape designer to re-design (typically for an extra fee). In design-bid-build, you select a contractor based on the bid price. It then becomes your responsibility to orchestrate all of the design and construction activities – including introducing the contractor to the designer.
Design-Build: At Madrone Landscape, we specialize in the design-build process. Our landscape architect and designers not only help you with the initial design, they also help navigate any obstacles encountered during construction. We provide construction cost estimates during the design process (for more information, see our design page). This usually adds time to the overall design time, for good reason. Knowing construction costs during the design process allows you to make decisions on where to spend money and keeps the plan within the desired budget. A cost-informed design means the value engineering is done well before the project starts. The entire team will be working together with the landscape designer to make sure that there are few unforeseen lapses between designs or construction activities. For new construction, this will include your engineers, architects, and builders. For custom residential updates, your design-build team becomes your expert advocate through design and construction and we handle scheduling and coordination with all parties involved.

Five Tips When Choosing Design-Build Landscaping
1. Know what you need/want before you start.
Often, a client will come to us with a list of items they want designed into their landscape, such as a patio, wall, fountain, or pergola. What they may actually mean is that they need a shady place to entertain guests with pretty things to look at. While your spouse may want a fountain, he or she may appreciate boulders and flowers just as much. When you prioritize your goals before starting design, you can prevent being caught off guard during the design process. Design is almost always a team decision. If you and your family can align your wants and needs before the design starts, the design will turn out better and go more quickly.
2. Establish a construction budget.
Before starting the design process, establish a budget or range for what you intend to spend on construction, and share that information with your designer. This will help them design within range. Typically, the construction cost of landscapes is between 10 to 25 times the design fee, although this may vary.
3. Take your time with budget decisions.
During the beginning of the design process decisions are easy; we refer to this as the honeymoon period. You may find yourself saying, “I love that stone veneer, it looks just like the picture I saw on Houzz!” After construction costs are introduced, major design elements may be on the chopping block. Do you keep the outdoor kitchen, or the stone paving? Allow yourself time, so you don’t rush these decisions.
4. Trust your gut – and your landscape team.
Taking on a big project and the resulting investment of your funds will greatly affect your daily life. You need experts you can trust to help you achieve your goals. If you don’t have a level of trust with your landscape team, the relationship and project will not work. You need to feel comfortable giving them both positive and negative feedback, and they need to feel comfortable giving you good and bad news. Your designer will not only be helping you with the initial design, but also will be helping to navigate any obstacles encountered during construction.
5. Communicate often and clearly.
During design and construction, changes happen. To best facilitate these changes, we will ask a lot of questions to make sure we are designing efficiently. Whether you would like to give us artistic license on decisions, or you have particular opinions that need to be known, it is important you communicate your preferences clearly.
A Better Investment and Landscape
It’s our experience that the design-build process produces a better product with stronger teamwork and a healthy working relationship. The process takes time to do well. Expect two to six months of design before construction for custom residential updates, and often longer for new home or new commercial construction. Being well prepared can shorten this time frame. If you have new construction, you should consider hiring your landscape architect at the same time that you hire an architect. We strongly believe that the design-build relationship you foster with us will make you feel good about the investment and the landscape you create.
Do you have additional questions about the design-build process and its benefits? Email us at [email protected] or give us a call at 805-466-6263.